XenGamer's Guide to the High Harper Quest: Dragonborn Paladin/Cleric Domination in Act 3 of Baldur's Gate 3 Act 3 of Baldur's Gate 3 throws challenges at you from every dimly lit alleyway and grand city square.

Act 3 of Baldur's Gate 3 throws challenges at you from every dimly lit alleyway and grand city square. To survive, you need more than just raw power; you need strategy, synergy, and a build that can handle anything the city throws at it. This guide walks you through the "High Harper" questline with a Dragonborn Oath of the Ancients Paladin (Level 7) / Life Cleric (Level 5) hybrid, optimized for radiant damage, healing, and, of course, righteous fury. We'll delve into the nitty-gritty, from dialogue choices to combat tactics, ensuring you not only complete the quest but dominate it.
Understanding the High Harper Questline
The High Harper questline is a critical part of Act 3, intertwining with the main story and offering significant rewards, impacting the fate of Baldur's Gate and those living in it. The Harpers, a secretive organization dedicated to protecting the innocent and upholding justice, have a strong presence in the city, and Jaheira, a returning character from the original Baldur's Gate, serves as a key figure.
Prerequisites: To kick things off, you'll need to have progressed sufficiently in Act 2 to recruit Jaheira as a companion. Upon arriving in Baldur's Gate and venturing into the Lower City, you'll eventually be contacted by the Harpers, usually after exploring key locations and advancing other Act 3 storylines. This initial contact will point you towards Jaheira and the High Harper Enclave, a hidden sanctuary within the city.
The Goal: The primary goal of the High Harper quest is to protect Jaheira and uncover a Zhentarim plot threatening the city. This involves infiltrating Zhentarim hideouts, gathering intelligence, and ultimately confronting the organization's leadership.
Strategic Importance: Completing this questline grants access to powerful allies, unique gear, and crucial information that will significantly aid you in the final stages of the game. It can also affect the narrative surrounding certain key characters and factions.
The Dragonborn Paladin/Cleric Hybrid: A Radiant Beacon
This build leverages the strengths of both the Oath of the Ancients Paladin and the Life Cleric, creating a powerful and versatile character. The Dragonborn race provides inherent resistances and a breath weapon, adding to your tactical options.
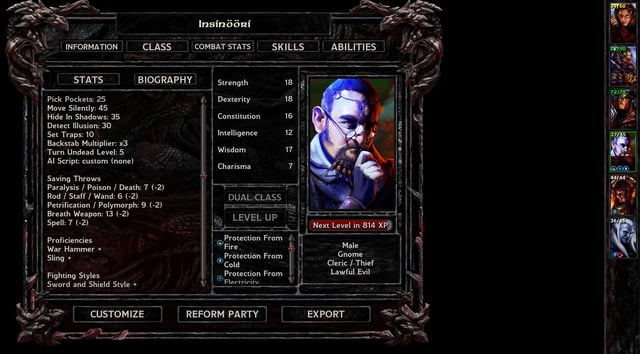
- Oath of the Ancients Paladin (Level 7): Provides excellent melee combat capabilities, Divine Smite for burst damage (especially effective with radiant damage buffs), Aura of Protection for saving throw bonuses, and Lay on Hands for emergency healing. The subclass spells are also very useful for crowd control and support.
- Life Cleric (Level 5): Grants access to powerful healing spells, heavy armor proficiency, and the Disciple of Life ability, which significantly boosts healing output. Combining this with the Paladin's Lay on Hands creates a potent healing machine.
This multiclass is effective because it allows you to be a strong melee combatant, a potent healer, and a support character all in one. The Dragonborn’s breath weapon adds an area-of-effect damage option that your other abilities might lack. Plus, roleplaying a righteous Dragonborn Paladin/Cleric is just plain awesome.
Gear Guide: Radiance and Resilience
Optimizing your gear is crucial for maximizing the effectiveness of this build. Here are some key items to look for in Act 3:
- Luminous Armor: Found in Act 3, this armor radiates light and grants temporary hit points when you heal allies. Perfect for boosting your survivability and supporting your team.
- The Reviving Hands: These gloves increase the amount of healing done and provide additional benefits to healing spells. A must-have for any Life Cleric.
- Blood of Lathander: While obtainable before Act 3, if you haven't gotten it, get it now. This mace deals radiant damage and provides a powerful healing aura.

Alternative Gear Progression: If you haven't acquired these specific items, focus on gear that boosts your spellcasting ability, radiant damage, and healing output. Look for items with the "Radiating Orb" effect, which debuffs enemies and makes them more vulnerable to radiant damage.
High Harper Questline: A Step-by-Step Walkthrough
Let's dive into the quest itself. Remember to save often, as choices matter.
1. Reaching the High Harper Enclave: After being contacted by the Harpers, follow the quest marker to a seemingly unassuming building in the Lower City. The entrance to the Enclave is hidden, requiring a successful Perception check or specific dialogue choices to reveal. The atmosphere is tense, with hushed whispers and wary glances from the Harpers present.
2. Protecting Jaheira from the Zhentarim Ambush: This is one of the first major encounters. After speaking with Jaheira, the Enclave will be attacked by Zhentarim mercenaries.
- Strategy: Position your Dragonborn Paladin/Cleric at the front to absorb damage and protect Jaheira. Use Bless to improve your party's attack rolls and saving throws. Divine Smite is your friend – use it liberally against high-priority targets. Jaheira is durable but needs support, so prioritize healing her with Healing Word and Lay on Hands.
- Dragonborn Tip: Use your breath weapon to damage multiple enemies clustered together. A well-placed breath attack can significantly weaken the Zhentarim ranks.
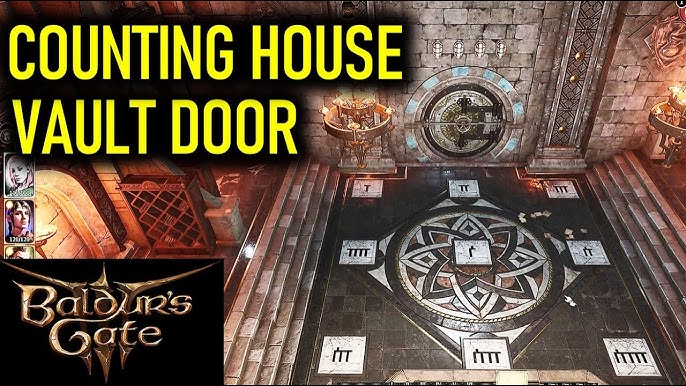
3. Investigating the Counting House: The Zhentarim are using the Counting House to launder money and fund their operations. You'll need to infiltrate the vault to gather evidence.
- Stealth Approach: The Counting House is heavily guarded. Consider using invisibility potions or spells to bypass patrols. Alternatively, you can attempt to persuade or bribe the guards.
- Combat Approach: If stealth fails (or if you prefer a more direct approach), be prepared for a tough fight. The guards are well-equipped and numerous. Focus fire on the most dangerous enemies and use crowd control spells to manage the numbers.
- Vault Navigation: The vault is a maze of corridors and locked doors. Look for hidden passages and use your party's skills (Thieves' Tools, Knock) to bypass obstacles. A map visual will certainly come in handy.

4. Confronting the Zhentarim Leader: After gathering enough evidence, you'll confront the Zhentarim leader, who will be in a hidden location within the Counting House or a nearby hideout. This encounter will likely involve a challenging boss fight.
- Boss Fight Strategy: Identify the boss's weaknesses and exploit them. Use Divine Smite to deal massive damage, and keep your party healed with Healing Word and Mass Healing Word. Consider using Command to force the boss to drop their weapon or skip a turn.
- Dialogue Choices: Certain dialogue choices can influence the outcome of this encounter. Persuading the boss to surrender or reveal information can avoid a difficult fight or provide valuable insights into the Zhentarim's plans. A successful Persuasion check (DC 15) can often turn the tide.
5. Reporting Back to Jaheira: After defeating the Zhentarim leader, return to the High Harper Enclave and report your findings to Jaheira. This will conclude the questline and unlock various rewards.
Tips and Tricks for Maximum Effectiveness
- Radiant Damage Synergy: Focus on maximizing your radiant damage output. Combine Divine Smite with spells like Guiding Bolt and items that grant the "Radiating Orb" effect to debuff enemies and increase your damage.
- Spell Slot Management: As a multiclass character, you'll need to manage your spell slots carefully. Prioritize spells that provide the most value, such as Bless, Healing Word, and Divine Smite. Use lower-level spell slots for healing and support, and save higher-level slots for burst damage and emergency situations.
- Dragonborn Breath Weapon: Don't forget about your Dragonborn breath weapon! It's a powerful area-of-effect attack that can be used to weaken groups of enemies.
- Jaheira's Approval: Jaheira is a key character in this questline, and her approval can influence the outcome. Make choices that align with her values of justice and protecting the innocent to gain her trust and unlock additional dialogue options and rewards.
PC-Specific Optimization for Baldur's Gate 3
Baldur's Gate is a visually stunning but demanding city. Here's how to optimize your settings for a smoother experience:
- FidelityFX Sharpening: Set this to around 0.3 for a good balance between visual clarity and performance.
- Nvidia Reflex: Enable this to reduce input latency if you have an Nvidia graphics card.
- Shadow Quality: Lowering this setting can significantly improve performance, especially in crowded areas. Try setting it to Medium or Low.
- Crowd Density: Reduce this setting to limit the number of NPCs on screen, which can help improve framerate.
Here are some mods that can enhance the roleplaying experience:
- Basket Full of Equipment SFW (NexusMods): Provides a wider range of cosmetic options and thematic armor sets that fit the Paladin/Cleric aesthetic.
- ImprovedUI (NexusMods): Streamlines character customization and provides a clearer inventory management system.
Installing mods is generally straightforward. You'll typically need a mod manager (like Vortex) and then simply download and install the mods from NexusMods. Be sure to read the installation instructions carefully for each mod.


Conclusion: A Harper's Reward
Completing the High Harper questline unlocks a wealth of rewards, including unique gear, powerful allies (potentially including Minsc!), and crucial information that will aid you in the final stages of the game. More importantly, you'll have significantly contributed to the safety and well-being of Baldur's Gate, solidifying your reputation as a true hero.

So, grab your mace, channel your divine energy, and venture forth! Baldur's Gate needs a hero, and with this Dragonborn Paladin/Cleric build, you're more than ready to answer the call. Now go forth and cleanse the city of evil, one Divine Smite at a time!