XenGamer's Definitive Guide: Resisting the Dark Urge in Baldur's Gate 3's House of Grief (and Saving Shadowheart) The House of Grief.
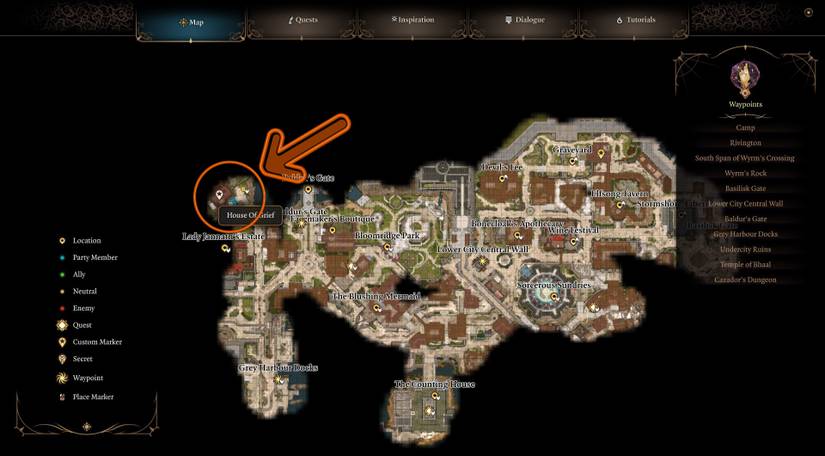
The House of Grief. Even the name sends shivers down the spines of seasoned Baldur's Gate 3 players. But for those undertaking a Dark Urge playthrough and desperately clinging to what's left of their soul, it's more than just a challenging encounter – it's a moral crucible. The pressure to succumb to your darker impulses reaches its zenith here, forcing a horrific choice regarding Shadowheart. This guide is for those of you determined to resist the Urge, save Shadowheart, and carve a path towards redemption, or at least a less blood-soaked ending. This path is undeniably harder, demanding tactical precision and unwavering resolve, but the rewards – both narratively and emotionally – are well worth the effort. We're assuming you're already familiar with Baldur's Gate 3's core mechanics; this is about mastering this specific encounter.
Step 1: Preparation is Paramount
Before even thinking about stepping foot inside the House of Grief, you need to do your homework.
- Shadowheart's Questline: This is non-negotiable. You want Shadowheart as close as possible to rejecting Shar's influence. Complete her personal quest as much as you can before entering. Every dialogue choice matters; lean heavily into options that promote independence and free will.
- Level Up: Aim for level 11 or 12. Anything lower and you're going to be significantly underpowered.
- Gear Up: Ensure everyone has appropriate gear. Resistances to necrotic damage are a bonus, as are items that boost Wisdom saving throws.
- Long Rest: Go into the fight with all resources available.
Step 2: The Shadow Monk – Your Ace in the Hole
While party composition is flexible, a Shadow Monk provides unparalleled control and survivability, making them essential for this fight. Here's a build focusing on crowd control:
- Core Stats: Prioritize Dexterity (16), Wisdom (16), and Constitution (14).
- Key Feats:
- Mobile: This is crucial for hit-and-run tactics, allowing you to move in, stun, and get out without taking too much punishment.
- Tavern Brawler: If you're inclined to use improvised weapons (throwing enemies is surprisingly effective), this is a solid choice.
- Resilient (Wisdom): Boosts your Wisdom saving throws, vital for resisting the Dark Urge.
- Essential Monk Abilities:
- Shadow Step: Your primary method of mobility and repositioning.
- Stunning Strike: This is the ability that will carry you through this encounter.
- Silence: Shut down spellcasters and other problematic enemies.
- Darkness: Create advantageous positions, especially in conjunction with Shadow Step.

Step 3: Initial Positioning – Setting the Stage for Success
Positioning is everything. The moment you trigger the dialogue that initiates the encounter, be ready.
- Monk Placement: Your Shadow Monk should be closest to Shadowheart. They're her bodyguard, ready to intercept any immediate threats.
- Ranged Support: Position your other party members to maximize ranged damage and area-of-effect spells. High ground is your friend.
- Pre-Buffing is King: Before the conversation even starts, cast Bless and Freedom of Movement on your Monk. Bless will help with both attack rolls and saving throws, and Freedom of Movement prevents debilitating conditions like Hold Person. Consider Haste as well, if you have a reliable caster.
Step 4: Rounds 1-3: Containment is Key
The initial wave is often the most dangerous.
- Stunning Strike Priority: Use Stunning Strike on the most threatening enemies. Prioritize those targeting Shadowheart or those with high damage output.
- Silence the Spellcasters: Sharran spellcasters can quickly turn the tide. Silence them immediately.
- Darkness Advantage: Use Darkness strategically to create pockets of advantage for your Monk. Remember, enemies can still see in Darkness, but it allows for easy Shadow Steps.
- Focus Fire: Concentrate your fire on enemies threatening Shadowheart directly. Don't spread your damage too thin.
Step 5: Resisting the Urge – The Mental Battle
This is where things get complicated. Throughout the fight, you'll be bombarded with dialogue options urging you to embrace the Dark Urge and kill Shadowheart.
- Choose Wisely: Consistently select dialogue options that resist the Urge.
- Wisdom Saving Throws: Prepare for a barrage of Wisdom saving throws. Bless is your friend here. Use any equipment or spells that boost Wisdom saving throws.
- Loss of Control: If you fail a saving throw, you'll temporarily lose control of your character. Immediately use abilities to protect Shadowheart – Sanctuary is a lifesaver.
- Expect the Unexpected: The dialogue and the fight are intertwined. Be ready to react to both simultaneously.

Step 6: Mid-Fight Reinforcements – Adapt and Overcome
The House of Grief isn't a one-wave wonder. Expect reinforcements.
- Maintain Crowd Control: Keep Stunning Strike and Silence on rotation.
- Area-of-Effect Spells: Unleash Fireballs, Ice Storms, and other AoE spells to whittle down groups of enemies.
- Summoned Creatures: Summoned creatures can act as distractions and soak up damage.
- Adapt to the Threat: The type of enemies spawning will change. Adjust your tactics accordingly.
Step 7: The Final Push – Finish Strong
Once the waves begin to slow, you're in the home stretch.
- Focus on High-Priority Targets: Eliminate any remaining powerful enemies.
- Keep Shadowheart Alive: This is paramount. Use healing potions and spells liberally. Remember that healing spells benefit from high Wisdom scores.
- Don't Get Cocky: One wrong move can wipe your party. Stay vigilant until the last enemy is defeated.
Tips and Tricks – Maximizing Your Advantage
These additional tips can give you the edge you need.
- Pre-Buffing (Again!): We can't stress this enough. Haste, Bless, Freedom of Movement – all these buffs provide a significant advantage.
- Environment Awareness: Use the environment to your advantage. Bottle neck enemies in doorways or create chokepoints with summoned creatures.
- Potion of Speed: A Potion of Speed on your Monk is a game-changer, allowing them to quickly move around the battlefield and stun multiple targets.
- Darkness Mastery: Master the art of using Darkness in conjunction with Shadow Step. This combination provides unparalleled mobility and tactical options.

PC-Specific Notes – Optimizing Performance
Act III can be a performance hog, particularly on PC.
- Optimize Settings: Lower "Shadow Quality" and "Crowd Density" settings to improve FPS. Consider disabling "Dynamic Crowds" altogether.

- Mod Recommendations: While optional, consider installing the "Bug Fix Compilation" mod from NexusMods to address potential bugs. The "Improved UI" mod can also help with inventory management and spell selection under pressure. Visit Nexusmods.com to explore these mods.
- Control Remapping: If the default controls feel awkward, remap key bindings to improve reaction time during crucial moments (e.g., assign Stunning Strike to an easily accessible key).
- Nvidia DLSS/AMD FSR: Experiment with DLSS/FSR settings for improved performance. Prioritize "Quality" or "Balanced" for the best visual fidelity.
Conclusion: A Triumph of Will
Resisting the Dark Urge in the House of Grief and saving Shadowheart is one of the most challenging and rewarding experiences Baldur's Gate 3 has to offer. It’s a testament to your tactical skill and your character's unwavering willpower. Successfully navigating this encounter unlocks a powerful and loyal companion for the rest of your journey, provides significant narrative payoff, and unlocks unique dialogue options related to the Dark Urge storyline. More importantly, it solidifies Shadowheart as a valuable asset, a friend, and perhaps even more, depending on your choices. Embrace the challenge, trust your instincts, and remember: even in the deepest darkness, hope can prevail.

Good luck, XenGamers! May your dice rolls be high, and your Urge be resisted.