Unleash Your Inner Dragonborn: A Comprehensive Guide to Modding Skyrim Hey there, fellow adventurer!
Hey there, fellow adventurer! Ever gaze across the windswept plains of Whiterun and think, "This is great, but I wish the grass was greener and dragons were deadlier"? If so, you've come to the right place. Welcome to the wonderful, sometimes bewildering, but ultimately rewarding world of Skyrim modding.
I'm here to be your guide, your Gandalf through the Mines of Moria (except, instead of Balrogs, we'll be battling load order conflicts). We'll be diving deep into the how-to, the what-for, and the why-not of transforming your Skyrim experience from vanilla to vibrantly, uniquely yours.
Official Skyrim key art. Modding allows you to create a vastly different experience than the vanilla game.
So, what exactly can you do with mods? The possibilities are truly staggering. We're talking simple texture replacements that make your steel armor gleam, gameplay tweaks that overhaul the entire combat system, the addition of entirely new quests and storylines rivalling the vanilla game’s scope, and even total conversions that transport you to entirely new worlds within the Skyrim engine.
Think about it: enhanced graphics that make the game look like it was released yesterday (or, well, maybe the day before), combat that feels more like Dark Souls than a button-mashing frenzy, or quests that explore the untold histories of Tamriel. We’re talking about Skyrim reborn.
Some popular and impactful mods to whet your appetite:
- Skyrim Script Extender (SKSE): The backbone for countless mods, enabling advanced scripting capabilities.
- Unofficial Skyrim Patch: Fixes hundreds of bugs Bethesda never got around to. Essential.
- Skyrim HD - 2K Textures: A massive visual upgrade, making everything sharper and more detailed.
- Alternate Start - Live Another Life: Skip the vanilla intro and begin your adventure in a variety of different scenarios.
- Ordinator - Perks of Skyrim: A complete perk overhaul, adding depth and complexity to character builds.
But with great power comes great responsibility... and the potential for crashes. Fear not! We'll tackle everything from installation and load order management to performance tweaks and troubleshooting. Let's get started.
Gearing Up: The Tools of the Trade
Before we can unleash the modding beast, we need to gather our tools. Here’s what you’ll need:
- A copy of Skyrim (duh!). The Special Edition is generally recommended for its stability and mod compatibility.
- Nexus Mods: Your one-stop shop for (almost) all things Skyrim modding. Create a free account. This is where you'll find the vast majority of mods. The categories are well-organized, so take some time to browse!
- Mod Organizer 2 (MO2): The gold standard in mod management. Download it from the Nexus Mods website. MO2 allows you to install and manage mods in a virtual environment, keeping your core Skyrim installation clean and making troubleshooting much easier.
- LOOT (Load Order Optimization Tool): Helps you automatically sort your load order. Download it from the Nexus Mods website. While LOOT isn't perfect, it's a great starting point.
- Skyrim Script Extender (SKSE): Download the correct version for your Skyrim version from skse.silverlock.org. Many advanced mods require SKSE to function.
 The Mod Organizer 2 (MO2) interface is your control center for modding Skyrim. Here, you can manage your mod list, load order, and profiles.
Step-by-Step: Modding Skyrim Like a Pro
Alright, let's get our hands dirty. Follow these steps carefully, and you'll be knee-deep in glorious mods in no time.
1. Installing Mod Organizer 2
- Download the latest version of MO2 from Nexus Mods.
- Run the installer. I highly recommend installing MO2 outside of your Skyrim installation folder (e.g.,
C:\Modding\MO2). This prevents potential permission issues. - When prompted, choose to create a portable instance. This keeps all MO2-related files within the MO2 installation folder, further isolating your Skyrim install.
- MO2 will ask you to manage your Skyrim installation. Select "Yes."
- MO2 will then prompt you to connect to Nexus Mods. This allows you to download mods directly from Nexus Mods through MO2.
2. Setting Up SKSE
- Download the latest version of SKSE for your Skyrim version from skse.silverlock.org. Important: Make sure you download the correct version!
- Extract the contents of the SKSE archive into your Skyrim installation folder (e.g.,
C:\Program Files (x86)\Steam\steamapps\common\Skyrim Special Edition). Do not extract it into the "Data" folder! - In MO2, click the "Executables" button (it looks like a gear).
- Click the "+" button and select "Add from file..."
- Navigate to your Skyrim installation folder and select
skse64_loader.exe. - Rename the new executable to "SKSE."
- Always launch Skyrim through the SKSE executable in MO2. This ensures that SKSE and its dependent mods are loaded correctly.
3. Downloading and Installing Mods from Nexus Mods
- Browse Nexus Mods (https://www.nexusmods.com/skyrimspecialedition for Skyrim Special Edition) and find a mod you like.
- Click the "Mod Manager Download" button. This will automatically send the mod to MO2 (if you've correctly associated MO2 with Nexus Mods).
- Alternatively, you can manually download the mod and add it to MO2 by clicking the "+" icon in the left panel and selecting "Install mod from archive."
- Once the mod is downloaded in MO2, it will appear in the left panel. Double-click the mod to install it.
- The mod will now appear in the mod list in the left panel. Make sure the checkbox next to the mod is checked to enable it.
 Your installed mods appear in the left panel of Mod Organizer 2. Ensure they are enabled by checking the box next to each mod name.
4. Load Order Management: Avoiding the Crash Monster
Load order is crucial. It determines the order in which your mods are loaded, and a bad load order can lead to conflicts, crashes, and general instability.
- Run LOOT by clicking the "Run" button in MO2 and selecting "LOOT."
- LOOT will automatically sort your load order based on its master list.
- Click "Apply" to apply LOOT's suggested load order.
- Important: LOOT isn't always perfect. You may need to manually adjust the load order based on mod descriptions and compatibility notes.
- As a general rule, smaller mods should load before larger mods. Mods that affect core gameplay mechanics should load earlier than mods that only add cosmetic changes.
- Here's a very basic example of a good load order:
- Unofficial Skyrim Patch
- Skyrim Script Extender (SKSE)
- Other master files (.esm files)
- Smaller mods (texture replacers, minor tweaks)
- Larger mods (quest mods, overhauls)
- Pay attention to any warnings or errors LOOT displays. These often indicate conflicts or missing dependencies.
5. Basic Performance Tweaks
Modding can impact performance. Here are some basic tweaks to help maintain smooth gameplay:
- Adjust graphics settings: Reduce shadow quality, draw distance, and other demanding settings.
- Use a lightweight ENB: ENBs (Enhanced Natural Beauty) are graphical overhauls that can dramatically improve visuals but can also tank performance. Choose a lightweight ENB preset or disable certain effects.
- Optimize textures: Use optimized texture packs or tools like Ordenador to compress textures without significant quality loss.
Troubleshooting: When Things Go Wrong
Modding isn't always smooth sailing. Here are some common issues and how to fix them:
- Crashes: The dreaded CTD (Crash To Desktop). Usually caused by load order issues, conflicts, or missing dependencies.
- Solution: Double-check your load order. Read mod descriptions carefully for compatibility notes. Use LOOT. Disable recently installed mods to identify the culprit.
- Missing Textures (Purple Textures): Occurs when a mod's textures aren't loading correctly.
- Solution: Ensure the mod is enabled in MO2. Check for missing dependencies. Make sure the mod's textures are in the correct folder structure.
- Conflicts: Two or more mods trying to change the same thing.
- Solution: Use LOOT to identify conflicts. Create a merged patch (more on this later). Manually adjust the load order. Choose which mod's changes you prefer.
- Performance Drops: Frame rate tanks after installing mods.
- Solution: Reduce graphics settings. Use optimized textures. Disable or uninstall performance-heavy mods.
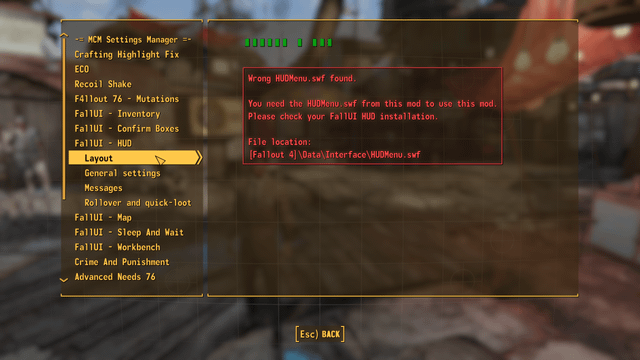
- Error Message: "Skyrim failed to launch": Often happens if SKSE isn't set up correctly or if a mod is interfering with the launch process.
 If you see an error message like this, carefully read the details. It may point to a missing master file, a conflict, or a problem with SKSE.
Cleaning Dirty Edits with xEdit
Some mods contain "dirty edits," which are unintentional changes to the game's data that can cause instability. xEdit (also known as TES5Edit for Skyrim) is a powerful tool for cleaning these edits.
- Download xEdit from Nexus Mods.
- Run xEdit through MO2.
- Select the mod you want to clean and click "OK."
- Right-click on the mod in the left panel and select "Apply Filter for Cleaning."
- Right-click on the mod again and select "Remove Identical to Master Records."
- Right-click on the mod again and select "Clean Masters."
- Save the changes.
Extra Tips: Level Up Your Modding Game
Ready to take your modding skills to the next level? Here are some advanced tips:
- Merged Patch: A single patch that combines leveled list changes from multiple mods, preventing conflicts and ensuring that all your mods' additions appear in the game.
- Bashed Patch: Similar to a merged patch, but also incorporates other types of changes, such as tweaks to game settings.
- Compatibility Patches: Mods specifically designed to make two or more other mods compatible. Always check for these when using popular mods.
- Mod Combinations: Experiment with different mod combinations to create unique gameplay experiences. For example, try combining a graphical overhaul with a combat enhancement mod and a survival mod for a truly immersive experience.
- Example:
- Graphics: Skyrim HD - 2K Textures, Enhanced Textures Detail (UV Tweaks), Realistic Water Two
- Combat: Wildcat - Combat of Skyrim, Mortal Enemies - De-aimbot Your Foes
- Survival: Frostfall - Hypothermia Camping Survival, Campfire - Complete Camping System
- Example:
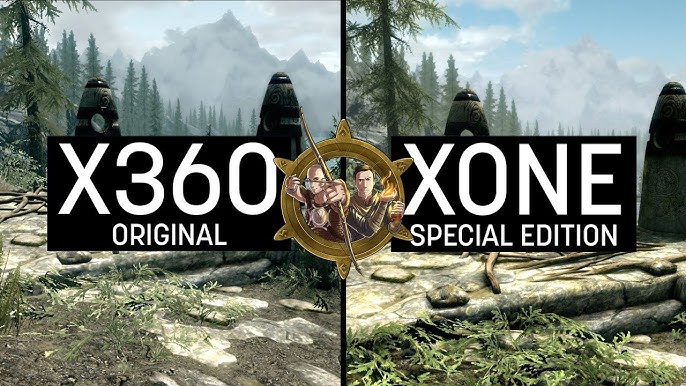
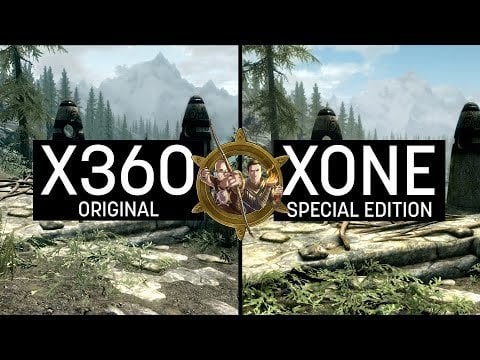
 Before (left) and after (right): The dramatic impact of a graphical overhaul on Skyrim. Notice the increased detail in textures, lighting, and environmental effects.
- Creating Your Own Mods: Once you're comfortable with installing and managing mods, consider learning how to create your own. The Creation Kit is Bethesda's official modding tool, and there are tons of tutorials available online. This is where you can really personalize the game to your exact vision.
- The Skyrim Modding Community: The Skyrim modding community is vast and supportive. Don't be afraid to ask for help on forums or in comment sections.
- Be Patient: Modding can be a time-consuming process. Don't get discouraged if you run into problems. With a little perseverance, you'll be able to create a Skyrim experience that's truly your own.
Conclusion: Your Skyrim, Your Way
Modding Skyrim is a journey, not a destination. There will be triumphs, there will be crashes, but in the end, you'll have a game that's uniquely tailored to your preferences. So, download those tools, install those mods, and unleash your inner Dragonborn. The world of Skyrim awaits, ready to be reshaped in your image. Good luck, and happy modding!