Unleash Your Inner Artist – Creating Custom Resource Packs for Minecraft: Java Edition Ready to give your Minecraft: Java Edition world a complete makeover?

Ready to give your Minecraft: Java Edition world a complete makeover? Forget the same old blocks and sounds. With custom resource packs, you can transform your game into anything you can imagine – a gritty medieval landscape, a sleek futuristic city, or even a blocky tribute to your favorite retro game. This guide will walk you through the process of creating and installing your own Minecraft resource packs, no advanced technical skills required! Whether you're a seasoned player or just starting out, prepare to unleash your inner artist and personalize your Minecraft experience like never before.
Requirements: Tools of the Trade
Before diving in, make sure you have these tools ready:
- Minecraft: Java Edition: A legal copy of Minecraft: Java Edition is required to use resource packs. You can purchase it from the official Minecraft website: https://www.minecraft.net/.
- Blockbench: This free and intuitive software is your go-to for creating custom 3D block models. Download it here: https://www.blockbench.net/.
- Image Editing Software: You'll need a program to create and edit textures. While Photoshop is a popular (paid) option, we recommend GIMP, a powerful and completely free alternative.
- A Text Editor: Notepad (Windows) or TextEdit (Mac) will suffice for editing simple configuration files.
Step-by-Step Instructions: From Pixel to Playable
Let's get started on your Minecraft makeover!
Setting Up Your Resource Pack Folder:
First, you'll need to locate the "resourcepacks" folder in your Minecraft game directory. Here's how:
- Windows: Press
Win + R, type%appdata%\.minecraftand press Enter. - Mac: Open Finder, press
Cmd + Shift + G, and type~/Library/Application Support/minecraft.
Inside the
.minecraftfolder, you'll find the "resourcepacks" folder. Create a new folder within it and give it a descriptive name, like "XenGamerCoolPack". This will be the home for all your custom resources.
- Windows: Press
Crafting the 'pack.mcmeta' File:
Every resource pack needs a
pack.mcmetafile. This file tells Minecraft about your pack, including its description and the Minecraft version it's compatible with. Create a new text file in your "XenGamerCoolPack" folder, rename it topack.mcmeta, and paste the following code:{ "pack": { "pack_format": 18, "description": "My awesome resource pack for XenGamer!" } }Important: The
"pack_format"value depends on the Minecraft version you're using. The number18corresponds to the latest release (Minecraft 1.20.4 at the time of writing). Make sure to check the Minecraft Wiki for the correctpack_formatvalue for your version. The "description" is what will be displayed in the Minecraft resource pack menu.
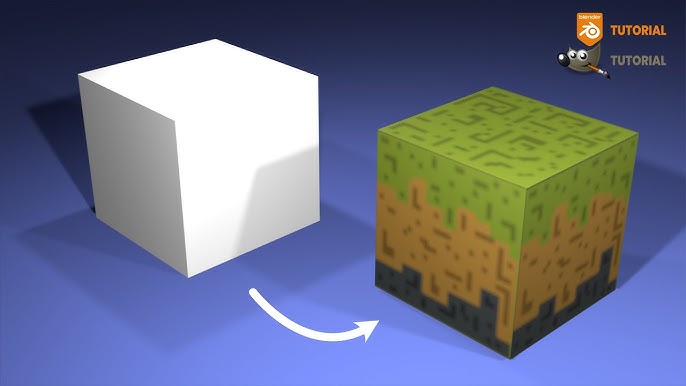
Texture Creation:
Time to get pixelated! Let's create a new texture for the cobblestone block.
- Open GIMP and create a new image with dimensions 16x16 pixels. This is the standard resolution for Minecraft textures.
- Design your new cobblestone texture. Get creative! You can make it smoother, rougher, a different color, or anything else that comes to mind.
- Save the image as
cobblestone.png. You need to save the image in the correct location within your resource pack folder, so create the following subdirectories:assets/minecraft/textures/block. Your full file path should look like this:XenGamerCoolPack/assets/minecraft/textures/block/cobblestone.png.
Model Creation (Optional):
Want to go beyond just textures? You can also create custom block models using Blockbench.
- Open Blockbench and create a new model of type "Block/Item".
- Add a cube to the model. This will be our base cobblestone shape.
- In the UV mapping section, assign the
cobblestonetexture you created earlier to all faces of the cube. - You can modify the shape of the cube, add more cubes, or even create entirely new shapes. For example, let's say you make the cube slightly taller and add some jagged edges.
- When you're happy with your model, export it as a
.jsonfile to theassets/minecraft/models/blockdirectory within your resource pack folder. Name itcobblestone.json.
Now, Minecraft needs to know to use this model instead of the default one. Create a new file called
cobblestone.jsoninsideassets/minecraft/blockstateswithin your resource pack and paste the following code:{ "variants": { "": { "model": "minecraft:block/cobblestone" } } }This tells Minecraft to use the model located at
minecraft:block/cobblestone(which refers to thecobblestone.jsonfile in yourassets/minecraft/models/blockdirectory) for the cobblestone block.
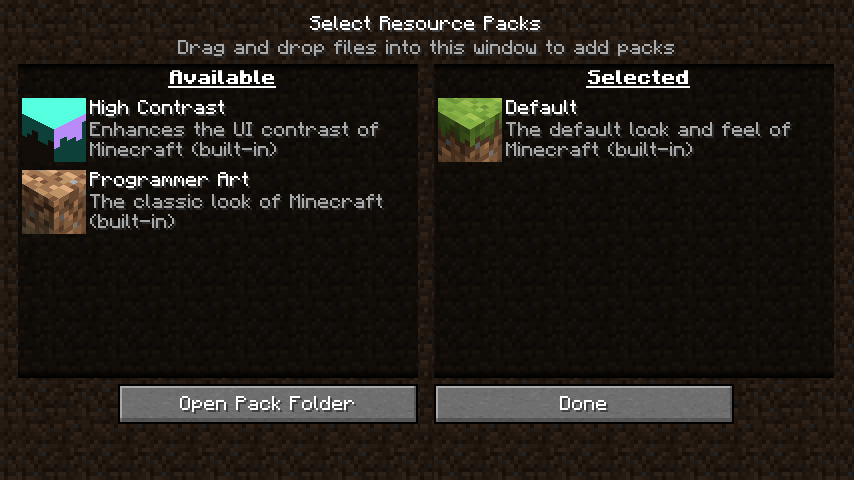
Installing and Activating the Resource Pack:
The moment of truth! Launch Minecraft: Java Edition and go to "Options" -> "Resource Packs". You should see your "XenGamerCoolPack" listed. Click the arrow to move it from the left column to the right column (the "Selected Resource Packs" column).
Minecraft loads resource packs in order, from top to bottom. If you have multiple resource packs, the ones at the top will override textures and models from the ones below. This is useful for layering different customizations.
Click "Done" and wait for Minecraft to reload. If everything went correctly, you should now see your custom cobblestone texture (and model, if you created one) in the game!
Troubleshooting: Battling the Bugs
Encountering issues? Don't worry, we've got you covered.
Missing Textures (Purple and Black Squares): This is the most common issue. It usually means that Minecraft can't find the texture file. Double-check the file paths in your
.jsonfiles and make sure thecobblestone.pngfile exists in theassets/minecraft/textures/blockdirectory within your resource pack folder. Case sensitivity matters!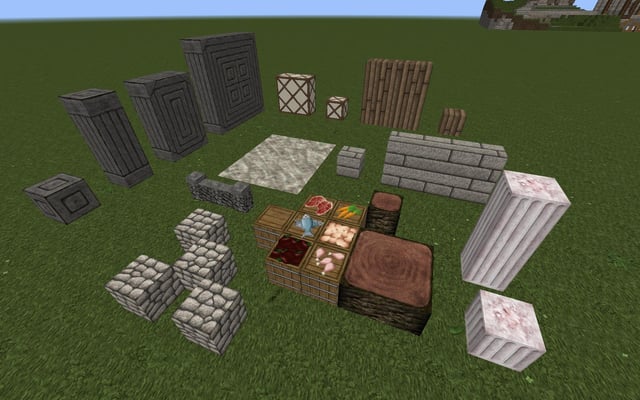
Low-Resolution Textures (Blurry Textures): Minecraft scales textures automatically. If your textures look blurry, it's likely because they're being scaled up from a low resolution. Create your textures at the correct resolution (e.g., 16x16, 32x32, or 64x64) to avoid blurriness. Higher resolutions look great, but can impact performance, so find the right balance for your system.
Game Crashes: Game crashes can be caused by incorrect JSON syntax in your
.jsonfiles or corrupted texture files. Use a JSON validator website to check for syntax errors. If you suspect a corrupted texture file, try replacing it with a fresh copy.
Extra Tips: Level Up Your Resource Packs
Ready to take your resource packs to the next level?
Advanced Block Modeling with Blockbench: Blockbench offers powerful features like UV mapping (controlling how textures are applied to models) and custom element creation (building models from individual pieces) for creating complex and detailed block models. YouTube is your friend here – search for "Minecraft Blockbench tutorial" to find tons of helpful videos from modding experts.
Connected Textures Mod (CTM): The Connected Textures Mod (CTM) allows you to create seamless textures on adjacent blocks, eliminating the tiling effect and creating a more natural look. For example, you can make a wall of bricks look like a single, continuous surface. To use CTM, you'll need to add special files and folders to your resource pack. A great place to begin is here: https://minecraft.wiki/w/Tutorials/Creating_connected_textures. You'll typically need to create a
ctmfolder insideassets/minecraft/textures/block, and within that, define properties files to instruct Minecraft which textures to connect and how. It's a bit more advanced, but the results are worth it!
Optimizing Resource Pack Size: Large resource packs can impact performance, especially on lower-end systems. To reduce the file size of your resource pack, compress your textures using lossless compression tools like TinyPNG. These tools reduce file size without sacrificing image quality. You can find TinyPNG here: https://tinypng.com/
Conclusion
Creating custom resource packs for Minecraft: Java Edition is a fantastic way to personalize your gaming experience and express your creativity. By following this guide, you've learned the basics of creating textures, models, and configuration files. Remember to experiment, explore, and don't be afraid to try new things. The possibilities are endless, and your Minecraft world is waiting to be transformed! So go forth, create, and share your amazing resource packs with the world. Happy crafting!