Unleash Night City: A Comprehensive Cyberpunk 2077 Modding Guide Welcome, choombas, to the wild world of Cyberpunk 2077 modding!
Welcome, choombas, to the wild world of Cyberpunk 2077 modding! Night City is already a sprawling, neon-drenched metropolis brimming with stories, but with the power of mods, you can truly make it your Night City. Whether you're looking to tweak the gameplay, overhaul the graphics, or even add entirely new quests and storylines, this guide will equip you with the knowledge and tools to customize your Cyberpunk 2077 experience like never before. Consider me your friendly neighborhood netrunner, here to guide you through the ins and outs of modding. We'll cover everything from the basics of installing mods to more advanced techniques like resolving conflicts and optimizing performance. So, plug in, jack in, and let's dive into the matrix of Cyberpunk 2077 modding!
The Modding Landscape: From Tweaks to Total Overhauls
The beauty of Cyberpunk 2077 modding lies in its vast possibilities. At its simplest, you can install cosmetic mods to change V's appearance, add new clothing options, or reskin weapons. But the rabbit hole goes much deeper. Imagine adding entirely new quests crafted by talented community members, rebalancing the combat system to your liking, or even implementing realistic driving physics. Graphics overhauls, powered by ENB presets and high-resolution textures, can transform Night City into a visual masterpiece. And for the truly ambitious, there are tools to create your own mods and share your vision with the world. The impact of modding on gameplay, storytelling, and immersion is undeniable, offering a personalized experience that extends far beyond the base game.
Essential Gear: Tools, Files, and Platforms
Before we start tinkering with Night City's code, let's gather our tools. Here's what you'll need:
Nexus Mods: This is your central hub for Cyberpunk 2077 mods. Create a free account to download mods and track your downloads. Nexus Mods Cyberpunk 2077
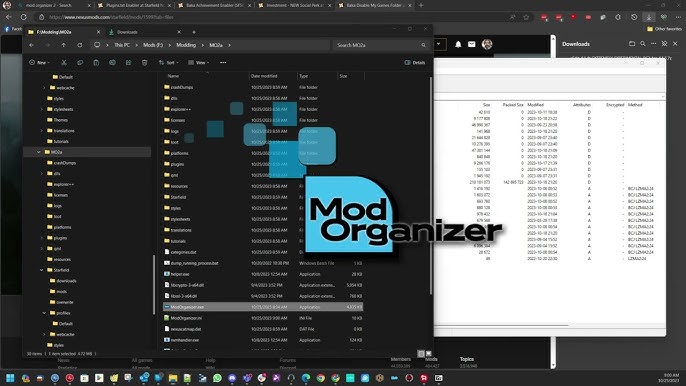
Mod Manager: Mod Organizer 2 (MO2): Ditch the manual installations. MO2 creates a virtual file system, keeping your core game files clean and making it incredibly easy to manage, activate/deactivate, and troubleshoot mods. Download it here: Mod Organizer 2 (Yes, it's originally for Skyrim, but it works wonderfully with Cyberpunk 2077).
Cyber Engine Tweaks: This is a crucial tool that enables many mods to function correctly by providing scripting capabilities and console access. Download it here: Cyber Engine Tweaks
RED4ext: Another essential for running code mods in Cyberpunk 2077. Many mods rely on this! RED4ext
.NET 6.0 Runtime: Some mods require this to function. Download it from Microsoft's website.
Step-by-Step Modding: A Practical Guide
Alright, let's get our hands dirty and install some mods!
1. Setting up Mod Organizer 2 (MO2):
- Download and install MO2.
- When prompted, create a new instance specifically for Cyberpunk 2077.
- MO2 will ask you to locate your Cyberpunk 2077 installation folder. Make sure it points to the correct directory.
2. Installing Essential Mods:
- Cyber Engine Tweaks: Download the latest version from Nexus Mods. Extract the contents of the archive directly into your Cyberpunk 2077 game folder (where
Cyberpunk2077.exeis located). Do not install this through MO2. - RED4ext: Download and extract the contents directly to your Cyberpunk 2077 game folder (same as Cyber Engine Tweaks).
- Any mod that comes with a 'plugins' folder: The same rule applies. Extract those contents directly into your Cyberpunk installation folder.
3. Installing Mods via Nexus Mods and Mod Organizer 2:
Browse Nexus Mods for a mod you want to install.
Click the "Mod Manager Download" button. This will send the mod directly to MO2 (you may need to authorize Nexus Mods to connect to MO2 the first time).
In MO2, the downloaded mod will appear in the downloads tab. Double-click it to install.
The mod will now appear in the left pane of MO2. Check the box next to the mod to activate it.
4. Load Order and LOOT:
- Load order matters! Mods need to load in a specific order to avoid conflicts.
- Download and install LOOT (Load Order Optimization Tool): LOOT
- Run LOOT. It will automatically detect your Cyberpunk 2077 installation and analyze your mods.
- Click the "Sort" button in LOOT. LOOT will automatically arrange your mods in the optimal load order.
- Apply the recommended load order in MO2 by dragging and dropping mods in the left pane to match LOOT's suggested order.
5. Configuring Mod Settings:
- Many mods have in-game settings menus. These can usually be accessed through the Cyber Engine Tweaks console (press the
~key). - Some mods require you to edit INI files. These files are usually located in the mod's folder within MO2's
modsdirectory. Always back up INI files before editing!
6. Graphics Overhauls and ENB Presets:
Installing ENB presets can dramatically improve the game's visuals, but they can also impact performance.
Download an ENB preset from Nexus Mods.
Extract the contents of the ENB preset archive into your Cyberpunk 2077 game folder (where
Cyberpunk2077.exeis located).You may need to adjust ENB settings in-game (using the Shift+Enter keys) to optimize performance and visual fidelity.

Troubleshooting: Netrunner Down?
Even with careful planning, you might encounter issues. Here's how to troubleshoot common problems:
Game Crashes or Freezes:
- Load Order: Double-check your load order using LOOT.
- Compatibility: Read the mod descriptions carefully to identify potential conflicts.
- Memory Limits: Cyberpunk 2077 can be memory-intensive, especially with mods. Try reducing graphics settings or disabling some mods.
Mod Conflicts:
- MO2 can help identify conflicts by highlighting files that are overwritten by multiple mods.
- Create merged patches using tools like xEdit (advanced) to resolve conflicts.
Performance Issues:
- Disable resource-intensive mods (especially graphics mods).
- Adjust graphics settings in the game and ENB settings.
- Consider using performance-enhancing mods.
Missing Textures or Models:
- Verify that the mod is installed correctly and activated in MO2.
- Check if the mod requires any dependencies.
Script Errors:
- Ensure that Cyber Engine Tweaks and RED4ext are installed correctly and up-to-date.
- Check for script conflicts between mods.
Extra Tips: Going Beyond the Basics
INI Tweaks: Experiment with advanced INI tweaks to further optimize performance or graphical fidelity. The PCGamingWiki is your friend!
Merged Patches: For advanced users, create merged patches in xEdit to resolve complex conflicts.
Recommended Mod Combinations: Explore community-curated mod lists for specific gameplay styles.
Community Resources: Join the Cyberpunk 2077 modding community on forums, wikis, and Discord servers for support and inspiration.
Bug Reporting: If you encounter a bug, report it to the mod author, providing as much detail as possible.
Cleaning Mods: Use tools like xEdit to clean dirty edits from mods, improving stability.
Diving Deeper: Mod Creation
Feeling ambitious? Want to create your own mods for Cyberpunk 2077? CD Projekt Red has released modding tools to do so! These tools include:
REDmod: CDPR's official tool which allows you to pack your mods in a compatible format for the game. You can download this through Steam, GOG Galaxy, or from CDPR themselves.
It's beyond the scope of this guide to delve into mod creation, but knowing it's possible opens up a whole new level of customization!
Conclusion: Your Night City, Your Rules
Modding Cyberpunk 2077 is a journey of discovery. It's about transforming Night City into the ultimate playground, tailored to your unique preferences. Don't be afraid to experiment, explore, and push the boundaries of what's possible. With the tools and knowledge provided in this guide, you're well-equipped to dive into the thriving Cyberpunk 2077 modding community and create a truly unforgettable gaming experience. Now go out there, choomba, and make Night City your own! Remember to check the Nexus Mods pages frequently, as the modding community is constantly creating and updating amazing new content. Happy modding!