Surviving the House of Grief: A Baldur's Gate 3 Walkthrough for XenGamers The House of Grief in Baldur's Gate 3.
The House of Grief in Baldur's Gate 3. Even the name sends shivers down the spine of seasoned adventurers. This isn't just another dungeon crawl; it's a brutal test of skill, strategy, and moral fortitude. As a seasoned gamer, I've seen my fair share of challenging encounters, but the sheer number of enemies and the oppressive atmosphere of Shar's domain make this one truly stand out. This guide provides a practical, fluff-free walkthrough to help you conquer this formidable challenge.
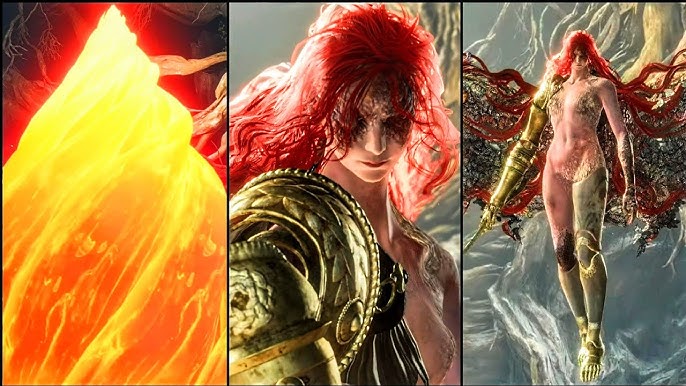
You've likely arrived at the House of Grief during Shadowheart's personal quest, seeking answers and potentially closure regarding her past and her connection to Shar. The narrative has built to this crescendo, with Shadowheart grappling with her faith and the player facing difficult choices that will shape her destiny. Entering the House of Grief means confronting the Mother Superior of the Sharrans, Viconia DeVir, and the countless devout followers who reside within its shadows.
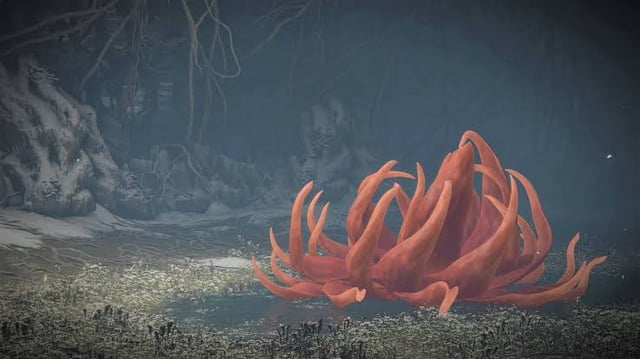
The House of Grief is a visually striking location, rendered in Baldur's Gate 3's photorealistic style. Predominant colors are deep purples, blacks, and grays, reflecting Shar's dominion over darkness and secrets. The architecture is gothic and imposing, with towering statues of Shar and intricate carvings depicting scenes of sorrow and sacrifice. A palpable sense of dread permeates the air, amplified by the soft chanting of the Sharrans and the echoes of suffering souls. The place just feels evil.
Preparing for the Onslaught
Before even thinking about stepping into the House of Grief, proper preparation is key. This isn't an encounter you can brute-force your way through without some serious thought.
- Level Up: Aim for at least level 10, preferably 11 or 12. The higher your level, the better your chances of survival.
- Party Composition: A balanced party is crucial. A strong tank, a dedicated healer, and powerful damage dealers (both melee and ranged) are essential. Consider bringing characters with abilities that can control crowds or inflict status effects like Hold Person or Hypnotic Pattern.
- Resistances: Many enemies in the House of Grief deal necrotic damage. Equipping items that grant necrotic resistance can significantly improve your survivability.
- Buffs: Before initiating the encounter, cast all your buffs. Bless, Aid, and Haste are particularly useful.
- Potions and Scrolls: Stock up on potions of healing, greater healing, and heroism. Scrolls of powerful spells like Fireball or Lightning Bolt can also come in handy.
Step-by-Step Strategy: Surviving the Shadow Swarm
The fight inside the House of Grief is less about a single powerful boss and more about surviving a massive wave of enemies. Viconia DeVir is present, but her true strength lies in the sheer number of Sharran followers at her command.
Phase 1: Initial Engagement
- Positioning: Before initiating dialogue with Viconia, position your party strategically. Place your tank in the front, near the entrance to the main chamber, to absorb the initial wave of attacks. Keep your ranged damage dealers and healer further back, protected from melee attacks.
- Pre-emptive Strike: As soon as the dialogue ends and combat begins, unleash your most powerful AoE (Area of Effect) spells. Fireball, Lightning Bolt, and Cloud of Daggers are excellent choices for thinning out the ranks of the Sharrans.
- Crowd Control: Use crowd control abilities like Hold Person, Hypnotic Pattern, or Grease to disable groups of enemies. Focus on preventing them from reaching your backline.
- Focus Fire: Concentrate your attacks on the most dangerous enemies, such as those wielding powerful weapons or casting spells. Eliminate them quickly to reduce the overall threat.
- Tank Management: Keep your tank alive by using healing spells and potions. Ensure they are always facing the largest group of enemies to maximize their defensive abilities.
Phase 2: The Tide Turns
- Viconia's Summons: As the fight progresses, Viconia will summon additional enemies. Be prepared for a fresh wave of Sharrans to enter the fray.
- Prioritize Interruption: If Viconia attempts to cast powerful spells, prioritize interrupting her. Use spells like Counterspell or abilities like Stunning Strike to prevent her from unleashing devastating attacks.
- Adapt and Overcome: The enemy composition may change throughout the fight. Be flexible and adapt your strategy accordingly. If you are facing a large number of melee enemies, focus on crowd control and AoE damage. If you are facing ranged attackers, prioritize eliminating them quickly.
- Target the Shadow Weave Adepts: These enemies can cast Darkness, severely hindering your visibility and spellcasting. Take them down as soon as possible.
Phase 3: Victory (Hopefully)
- Attrition: At this point, the fight becomes a war of attrition. Continue to focus fire on the most dangerous enemies, manage your resources carefully, and keep your party alive.
- Viconia's Downfall: Once you've thinned out the ranks of her followers, focus your attacks on Viconia. She is a formidable opponent, but she can be defeated with coordinated attacks and strategic use of abilities.
- Claim Your Reward: Once Viconia is defeated, loot her body and the surrounding area for valuable items and equipment. Don't forget to speak with Shadowheart to progress her questline.
Tips and Tricks for the House of Grief
- Darkness is Your Enemy (and Sometimes Your Friend): The Sharrans love to use Darkness. Counter it with spells like Daylight or by equipping characters with items that grant Truesight. Alternatively, if you have characters with Devil's Sight (like a Warlock), you can use Darkness to your advantage, granting them advantage on attacks while enemies are blinded.
- High Ground Advantage: Positioning your ranged characters on higher ground grants them an advantage on attack rolls.
- Potion of Speed is Your Best Friend: Haste is incredibly powerful in this fight. Use Potions of Speed to give your damage dealers an extra action each turn.
- Exploit Bottlenecks: The entrance to the main chamber is a natural bottleneck. Use this to your advantage by positioning your tank in the doorway and funneling enemies into a small area.
- Alternative Strategies: If you're struggling with the main fight, consider exploring alternative approaches. You can try to sneak past the enemies or use dialogue options to avoid combat altogether, though these options may have consequences for Shadowheart's quest.
- Melee Build Power: If you are running a melee build, consider using abilities like Pommel Strike or Lunging Strike to close the gap and stagger enemies before unleashing powerful combos.
PC-Specific Notes
Here's where we XenGamers get a leg up, knowing our platform inside and out.
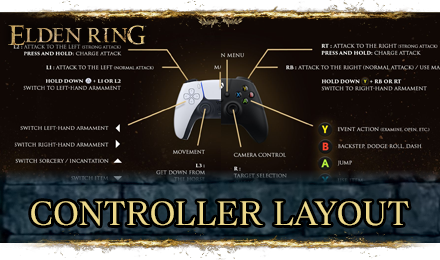
Controls: Rebinding the 'dodge' key to 'Shift' allows for easier access during fast-paced combat. Consider creating custom control schemes for different characters or situations. If you're using a gamepad, experiment with different button layouts to find what works best for you.
Settings:
- Low-End: Lowering the texture quality, shadow quality, and draw distance can significantly improve performance on low-end PCs.
- Mid-Range: Experiment with medium to high settings for most options. Disable resource-intensive features like ambient occlusion and subsurface scattering.
- High-End: Crank everything up to ultra! If you're still experiencing performance issues, try disabling VSync or adjusting the resolution scaling.
- Tweaks: For further optimization, you can tweak the config files located in the game's installation directory. However, be careful when modifying these files, as incorrect settings can cause instability.
Mods: While the unmodded experience is fantastic, mods can further enhance your enjoyment. Consider using mods that improve performance, add new character customization options, or rebalance combat encounters. A popular choice is performance-enhancing mods that optimize textures and reduce stuttering. Just be sure to check compatibility before installing any mods.
Performance: If you are experiencing stuttering or frame rate drops, try updating your graphics drivers, disabling background processes, or verifying the integrity of your game files. Sometimes, a simple restart can also do the trick.
Conclusion: A Victory for the Light (or the Dark?)

By successfully navigating the House of Grief and defeating Viconia, you unlock several key rewards:
- Story Progression: Completing this section significantly progresses Shadowheart's personal questline, leading to crucial decisions that will shape her future.
- Viconia's Walking Fortress: A very rare shield, offering +3 Armor Class, Advantage on Saving Throws against spells, and the ability to cast Reflective Shell.
- Experience Points: You'll gain a significant amount of experience points from defeating the enemies in the House of Grief, helping you level up your characters.
- Potential Allies (or Enemies): Depending on your choices, you may gain new allies or create powerful enemies.
- Shadowheart's Choice: Ultimately, the House of Grief culminates in Shadowheart making a pivotal decision about her allegiance to Shar or embracing a different path. This choice has far-reaching consequences for the rest of the game.
The House of Grief is a challenging but rewarding experience in Baldur's Gate 3. With proper preparation, strategic thinking, and a little bit of luck, you can overcome this formidable obstacle and continue your adventure. Good luck, XenGamers!