Surviving "The Heist": A XenGamer's Guide to Cyberpunk 2077's Defining Mission Welcome, choombas, to another deep dive here at XenGamer.
Welcome, choombas, to another deep dive here at XenGamer.com. Today, we're tackling one of the most pivotal and memorable missions in Cyberpunk 2077: "The Heist." This mission isn't just another gig; it's the moment V and Jackie go from small-time mercs to almost-legends (emphasis on the almost). It sets the stage for the entire game, introducing key players and escalating the stakes to a whole new level. Whether you're a seasoned veteran or a fresh-faced newbie navigating Night City for the first time, this guide will provide you with the actionable, insightful advice you need to make it through "The Heist" in one piece (or, at least, mostly in one piece). No fluff, no filler, just the straight dope.
Context: High Stakes in the Corpo Plaza
"The Heist" follows V and Jackie's most ambitious job yet: stealing the Relic from Yorinobu Arasaka's penthouse suite in Konpeki Plaza. This mission is crucial because it's where V first encounters the Relic, which contains the engram of Johnny Silverhand, setting the main plot in motion. Your choices during "The Heist," particularly the dialogue options and how you handle the unexpected events, can subtly influence your relationship with Jackie and, later, Johnny.
Step-by-Step Strategy: From Konpeki Plaza to the Afterlife
Alright, let's get down to business. Here's a breakdown of how to navigate "The Heist" successfully.
1. The Setup:
- Meet Jackie at Lizzie's Bar: Begin by meeting Jackie at Lizzie's Bar. This is a good opportunity to stock up on consumables and ammo.
- Rendezvous with T-Bug: Head to Konpeki Plaza and meet up with T-Bug. Listen to her briefing carefully; she's your lifeline during the operation.
2. Infiltration:
- Follow Jackie's Lead: Stick close to Jackie and follow his instructions. He knows the plan and the layout better than you do at this point.
- The Elevator Ride: During the elevator ride, Yorinobu Arasaka will arrive. Depending on your lifepath, you'll have unique dialogue options here. Choose them for extra flavor, but they don't significantly impact the mission outcome.
3. Stealing the Relic:
- Yorinobu's Suite: Once inside the suite, follow Jackie to the Relic. T-Bug will guide you through disabling the security systems.
- Grab the Relic: Interact with the Relic to steal it. This triggers the alarm and initiates the escape sequence.
4. The Escape:
- Combat Encounter: Arasaka security forces will swarm the suite. Use cover effectively and prioritize taking down the closest threats first. Jackie will provide covering fire, but don't rely on him to carry you.
- Make Your Way to the AV: Fight your way through the suite towards the AV (air vehicle) landing pad. Stick to cover and utilize your grenades and cyberware abilities to gain an advantage.
- The Rooftop Ambush: As you reach the rooftop, you'll encounter more resistance. Clear the area before attempting to board the AV.

5. The Betrayal:
- The AV Crash: During the escape, things go south fast. The AV is shot down, and you'll crash land.
- Injured and on the Run: After the crash, you and Jackie are injured. Follow Jackie as you try to escape the hotel.
6. The Final Moments:
- Delivering the Relic: The situation deteriorates rapidly. Jackie will insist on delivering the Relic to Dexter DeShawn.
- The Afterlife: This is where things get truly emotional. Depending on your choices during the mission, you'll have different options for Jackie's fate.
Tips and Tricks: Going the Extra Mile in "The Heist"
- Stealth is an Option (Sort Of): While "The Heist" is primarily a combat-focused mission, you can utilize stealth to thin out the enemy ranks before engaging in open combat. Use quickhacks like "Distract Enemies" and "Sonic Shock" to your advantage.
- Loot Everything: Take the time to loot containers and enemies throughout Konpeki Plaza. You can find valuable weapons, armor, and consumables that will aid you in the escape.
- Malorian Arms 3516: There's a way to grab the legendary Malorian Arms 3516 pistol (Johnny Silverhand's gun!) during the mission, though it's missable. During the initial exploration of Yorinobu's penthouse, before grabbing the Relic, explore thoroughly. The gun is located in a locked weapons case. If you have high enough Technical Ability, you can unlock it. If not, you'll need to come back later with a higher stat.
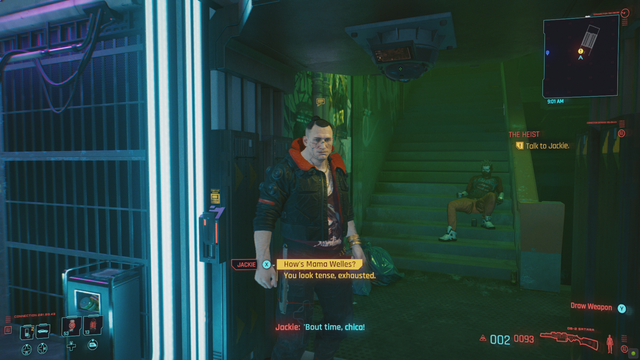
- Dialogue Choices Matter (A Little): While the main outcome of "The Heist" is fixed, your dialogue choices can influence your relationship with Jackie and the overall tone of the mission. Choose options that reflect your character's personality and values.
- Exploit Enemy Weaknesses: Scan enemies to identify their weaknesses. Some enemies are vulnerable to specific damage types (e.g., electrical damage against robots).
- Optimize Your Build: Even early in the game, your build matters. Focus on skills that enhance your combat effectiveness, such as Reflexes for weapon handling and Cool for stealth.
PC-Specific Notes: Optimizing Performance and Controls
- Control Mappings: Remap your dodge/dash to a more accessible key, such as a mouse button. This will significantly improve your survivability in combat.
- Graphics Settings: In the graphics settings, pay attention to shadow quality and ambient occlusion. Lowering these settings can significantly improve framerate without sacrificing too much visual fidelity.
- Visibility in Dark Areas: "The Heist" features several dark areas. Adjust your brightness and contrast settings to ensure you can see enemies clearly. Experiment with different gamma settings to find what works best for your monitor. Consider using a mod that improves lighting if you are still having visibility issues.
- .ini Tweaks: For advanced users, tweaking the game's .ini files can further optimize performance. However, be cautious when modifying these files, as incorrect changes can cause instability. Look for community guides on XenGamer.com for recommended .ini tweaks.
Dealing With Jackie's Body: A Crucial Choice
After the intense firefight and AV crash, you're faced with a difficult choice regarding Jackie's body. This decision impacts the game later on, so choose wisely!
The Options:
- Send Jackie's Body to Vik Vektor: This ensures that Jackie's body is treated with respect and that Misty, his girlfriend, can properly mourn him.
- Send Jackie's Body to his Family: This allows Jackie's family to have closure and provides an opportunity for V to connect with them later in the game.
- Leave Jackie's Body in the AV: This is generally considered the "bad" choice. It disrespects Jackie's memory and closes off potential storylines.
Recommendation:
- Sending Jackie's body to his family is the generally recommended choice. It leads to a heartfelt side mission later in the game, where you can attend his ofrenda and learn more about his life. This option provides the most emotional payoff and strengthens V's connection to Night City.
The Aftermath and Progression
Successfully completing "The Heist" unlocks several key elements:
- Story Progression: You advance to the next act of the game, diving deeper into the mystery of the Relic and Johnny Silverhand.
- New Characters: You gain access to new characters, including Dexter DeShawn (initially), and further develop your relationship with existing ones like Viktor Vektor and Misty.
- The Heist Reward: While the job itself goes sideways, you still earn experience, street cred, and access to new gigs and opportunities.

Conclusion: A Turning Point in Night City
"The Heist" is more than just a mission; it's a crucible. It tests your skills, your resolve, and your relationships. Surviving it (with or without Jackie) is a testament to your ability to navigate the treacherous world of Cyberpunk 2077. You've faced Arasaka security, survived a AV crash, and made difficult choices that will shape your destiny. Now, get back out there, choomba, and show Night City what you're made of. You've earned it.
Looking for more Cyberpunk 2077 guides? Check out our complete character build guide here on XenGamer.com/cyberpunk-builds (Placeholder link - Replace with actual XenGamer URL).

