Rock and Stone to the Bone: A Driller's Guide to Hazard 5 Deep Dives on XenGamer.
Alright, Miners! It's your friendly neighborhood Driller here, ready to share the secrets to surviving the absolute worst that Hoxxes IV can throw at you: Hazard 5 Deep Dives. We're not talking about your casual stroll through the caves, picking daisies and petting loot bugs. We're talking about relentless swarms, unforgiving terrain, and the kind of pressure that turns even the most seasoned dwarves into jittering wrecks. But fear not! With the right loadout, a dash of cunning, and a whole lotta explosives, even the gnarliest Deep Dive can be conquered. This ain't no fluff piece; this is a straight-to-the-point, no-nonsense guide on how to become a Hazard 5 Driller god. So grab your pickaxe, chug a beer (or three), and let's get drilling!
Loadout: Embrace the Freeze and the Boom
Surviving Hazard 5 as a Driller is all about controlling the swarm and manipulating the terrain to your advantage. Here’s the setup that’ll turn you into a subterranean force to be reckoned with:
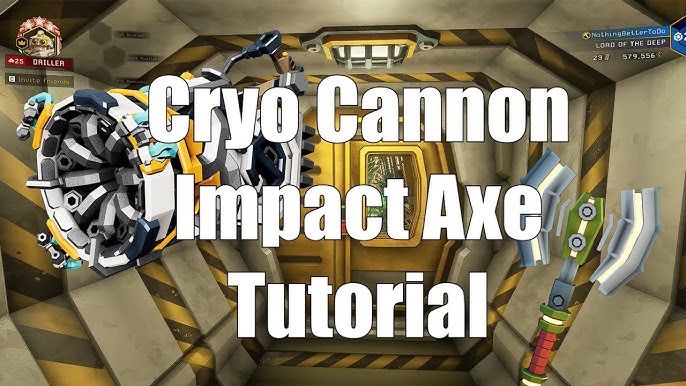
Primary Weapon: Cryo Cannon - The Great Equalizer
On Hazard 5, freezing is everything. It slows down those relentless glyphids, making them easier to hit and buy you precious time. Trust me, you'll need it.
- Mod Recommendations:
- Tier 1: Improved Freezing Power - Faster freezing is always better.
- Tier 2: Larger Ammo Bags - More freezing for more friends!
- Tier 3: Faster Cooling - Get back to freezing faster after prolonged use.
- Tier 4: Improved Freezing Rate - Even more freezing!
- Tier 5: Snowball - A surprisingly effective panic button.
- Mod Recommendations:
Secondary Weapon: Subata 120 - The Finisher
The Subata isn't just a backup; it's a crucial tool for finishing off frozen enemies and triggering that beautiful Explosive Reload.
- Mod Recommendations:
- Tier 1: Accuracy - Helps land those crucial shots on frozen targets.
- Tier 2: Magazine Size - More bullets, more kills. Simple as that.
- Tier 3: Blowthrough Rounds - Increased penetration for dealing with clustered frozen enemies.
- Tier 4: Automatic Fire - Makes the Subata more forgiving for close-quarters engagements.
- Tier 5: Increased Damage - Put more glyphids in the dirt (or ice!).
- Mod Recommendations:
Grenade: Impact Axe - Predictive Carnage
These aren't just for show. Learn to predict enemy movements and throw these axes into oncoming waves before they reach you. A well-placed axe can thin out a swarm dramatically.
Drills: Your Personal Escape Route
The Drills are more than just for mining. They're your personal escape route, your emergency exit, and your key to terrain dominance. Master them.
- Mod Recommendations:
- Tier 1: Hardened Drill Tips - Drill through anything faster.
- Tier 2: Faster Drill Speed - Essential for quick escapes.
- Tier 3: Fuel Tank Size - Stay underground longer.
- Tier 4: Overclocked Drills - Even faster drilling! Speed is LIFE!
- Advanced Technique: Drill-dozing
- Use the drills to flatten terrain, creating wider paths and better maneuverability, especially in tight corridors.
- Mod Recommendations:
Satchel Charge (C4): The Area Denial King
C4 is your primary area denial tool. Use it to create chokepoints, clear landing zones, and obliterate tightly packed swarms.
- Mod Recommendations:
- Tier 1: Increased Damage - More boom, more dead bugs.
- Tier 2: Increased Range - Hit enemies further away.
- Tier 3: Extra Charge - Never hurts to have an extra charge for emergencies!
- Mod Recommendations:
Perks: The Survival Kit
Choosing the right perks can make or break your Deep Dive run. Here's what I recommend:
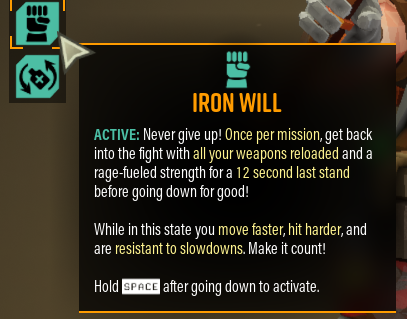
- Iron Will: A second chance is invaluable on Haz 5.
- Dash: An absolute must for dodging those nasty Praetorian spitters and Bulk Detonator explosions.
- Resupplier: Faster resupplies mean more ammo and health when you desperately need them.
- Thorns: A little extra damage to those pesky swarmers that get too close.
- Vampire: Sustain yourself by meleeing the weaker enemies after freezing them.
Mission-Specific Adaptations: Digging Deep
Every mission type demands a slightly different approach. Here's how to adapt your Driller playstyle:
- Mining Expedition: Carve paths to those hard-to-reach veins of Morkite. Create firing lines for your teammates and funnel enemies into kill zones.
- Egg Hunt: Drill into walls to create interconnected tunnels. This allows for quick escapes and flanking maneuvers when you get overwhelmed by Glyphid hordes.
- Salvage Operation: Use C4 to clear the area around the drop pod landing zone before it arrives. Fortify the area with tunnels and chokepoints.
- On-Site Refining: Drill tunnels to efficiently connect the pipelines. Create safe zones along the pipeline routes for your team to fall back to.
- Escort Duty: Carve tunnels ahead of Doretta to bypass dangerous terrain and create firing positions for your team. Prepare for ambushes!

Tips and Tricks: Mastering the Art of Drilling
Here are some advanced techniques to elevate your Driller game:
- Cryo Minelet: Freeze a Glyphid Grunt, then drill it instantly. This causes a lethal explosion, dealing massive damage to nearby enemies.
- Aggro Management: Use your Driller's presence to draw enemy fire. Position yourself strategically to protect your squishier teammates, like the Scout.
- C4 Jump: Use C4 to launch yourself to otherwise inaccessible locations. Be careful, though! This can cause significant self-damage.
- Sound Cues: Learn to recognize enemy types by their audio signature. Knowing what's coming allows you to prepare accordingly.
PC-Specific Notes: Optimizing Performance
To get the most out of your Driller experience, optimize your visual settings:
- Bloom: Lower to medium. This will help reduce the blinding effect of explosions and light sources, improving visibility.
- Light Quality: Medium or High (test for performance). Find a balance between visual fidelity and frame rate.
- Shadow Quality: Medium. Shadows can be performance-intensive.
- Contrast: Increase slightly to compensate for darkness.
- Gamma: Calibrate your monitor for optimal dark scene visibility.
Keybinds: Rebind your "Drill" key to something more accessible. Quick and precise tunneling is crucial!
Conclusion: Embrace the Chaos
Surviving Hazard 5 Deep Dives as a Driller is a challenge, but it's also incredibly rewarding. By mastering crowd control with the Cryo Cannon, manipulating terrain with your drills, and understanding the nuances of each mission type, you'll be carving through swarms and carrying your team to victory. So get out there, Miners, and show Hoxxes IV what a real Driller can do!
Rock and Stone!