Retro Gaming Emulation Station: Build Your Dream Console with Raspberry Pi 5 Ready to relive the glory days of gaming?

Ready to relive the glory days of gaming? Building a retro gaming emulation station is a fantastic way to experience classic titles on modern hardware. In this guide, we'll walk you through creating a powerful yet cost-effective emulation setup using the Raspberry Pi 5. We'll cover everything from component selection to performance optimization, ensuring you can enjoy your favorite retro games with ease, whether on a brand-new HDMI display or an old-school CRT TV. Let's dive in and unlock a world of nostalgia!
Purpose: A Time Machine for Gamers
This project aims to create a dedicated retro gaming emulation station capable of accurately emulating consoles from the Atari 2600 all the way to the PlayStation 1. A key focus is versatility: playing classic games on both modern HDMI-compatible displays and original CRT TVs. The end result? A compact, powerful device that lets you experience gaming history.
Core Components: The Heart of Your Retro Machine
Here's a breakdown of the core components you'll need to build your Raspberry Pi 5 emulation station:
CPU: Raspberry Pi 5
The Raspberry Pi 5 is the brains of the operation. Its processing power is a significant leap over previous models, allowing for smoother emulation of more demanding consoles.
Considerations:
- Overclocking: The Raspberry Pi 5 can be overclocked to squeeze out even more performance. However, this generates more heat, so proper cooling is essential.
- Heat Management: Overclocking or even running demanding emulators at stock speeds can cause the Pi 5 to overheat. Investing in a heatsink or small fan is highly recommended.
GPU: Integrated GPU
The Raspberry Pi 5 relies on its integrated GPU. While not a powerhouse, it's sufficient for most retro gaming needs.
Limitations:
- Don't expect to run PlayStation 2 or GameCube games flawlessly. The integrated GPU simply isn't powerful enough.
- Some more demanding PlayStation 1 titles might require tweaking emulator settings for optimal performance.
RAM: 8GB LPDDR4X
The Raspberry Pi 5 comes with 8GB of LPDDR4X RAM. This is ample memory for running emulators and operating systems like RetroPie. More memory rarely hurts, but the Pi 5 strikes a good balance.
Storage: SanDisk Extreme Pro 512GB MicroSD Card
The SanDisk Extreme Pro 512GB MicroSD card is crucial for storing your ROMs and operating system.
Why reliability and speed matter:
- Emulator Performance: Faster read/write speeds translate to quicker loading times and smoother gameplay.
- Reliability: A reliable SD card reduces the risk of data corruption and ensures your games are always accessible.
PSU: Official Raspberry Pi 5 Power Adapter
The official Raspberry Pi 5 power adapter is a must-have. It provides the necessary voltage and amperage to power the Pi 5 reliably.
Specifications:
- Voltage: 5.1V
- Amperage: 5A
- Using a lower-quality power adapter can lead to performance issues or even damage the Pi.
Case: RetroFlag NESPi 4 Case
The RetroFlag NESPi 4 Case not only provides a nostalgic aesthetic but also offers practical benefits.
Aesthetic Appeal and Cooling:
- The NES-inspired design adds a touch of retro charm to your setup.
- The case includes a built-in fan and heatsink, which helps keep the Raspberry Pi 5 cool during extended gaming sessions.
- Offers easy access to ports and slots while providing good physical protection.
Optional Add-ons: Enhancing Your Retro Experience
While the core components are essential, these optional add-ons can further enhance your retro gaming experience:
Cooling: Heatsink or Small Fan
Even with the NESPi 4 case, consider adding an additional heatsink or small fan for improved cooling, especially if you plan to overclock your Raspberry Pi 5. This will improve performance over longer gaming sessions.
Peripherals: 8BitDo Pro 2 Bluetooth Controller
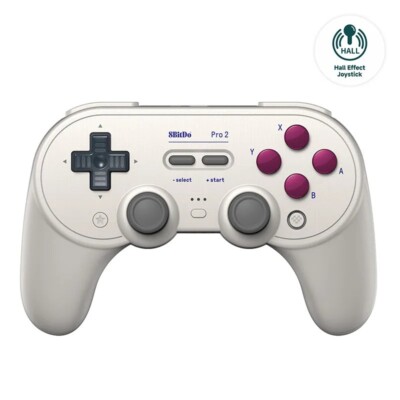
The 8BitDo Pro 2 Bluetooth Controller is an excellent choice for retro gaming.
Custom Profiles for Emulators:
- It offers a comfortable grip, responsive buttons, and Bluetooth connectivity.
- You can create custom profiles for various emulators, mapping buttons to your preferred configurations.
- Works with PC's and Raspberry Pi's out of the box!
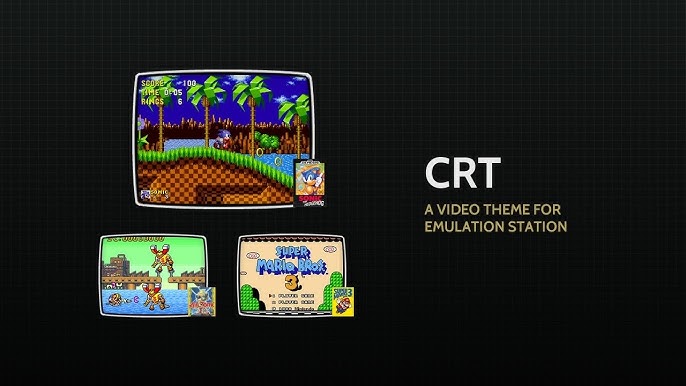
Monitors: Modern HDMI and CRT TVs
For modern displays, any HDMI monitor will work.
Connecting to CRT TVs:
- To connect to a CRT TV, you'll need a composite video cable (red, white, yellow).
- Some CRT TVs may also support component video (red, green, blue), which offers slightly better image quality.
Accessories: The Finishing Touches
Don't forget these essential accessories:
- MicroSD card reader: For flashing the RetroPie image to the SD card.
- HDMI cable: To connect to your modern display.
- USB extension cable: Can be useful for connecting peripherals.
Performance Expectations: How Will It Run?
Here's a breakdown of performance expectations for various emulators on the Raspberry Pi 5:
- Atari 2600, NES, Genesis: These consoles should run flawlessly at full speed.
- SNES: Most SNES games will run perfectly, but some demanding titles might experience minor slowdown.
- PlayStation 1: The Raspberry Pi 5 can handle most PlayStation 1 games, but some titles may require tweaking emulator settings.
- Nintendo 64: Performance is a mixed bag. Some games run well, while others suffer from significant slowdown.
- PlayStation Portable: Similar to the Nintendo 64, some games will run great while others will not function at all.
Example Games and Expected Framerates:
- Super Mario World (SNES): 60fps
- Chrono Trigger (SNES): 60fps
- Final Fantasy VII (PlayStation 1): 30fps (with occasional dips)
- GoldenEye 007 (Nintendo 64): 20-30fps (highly variable)
Optimizations:
- Tweaking emulator settings: Experiment with different emulator cores and settings to find the optimal configuration for each game.
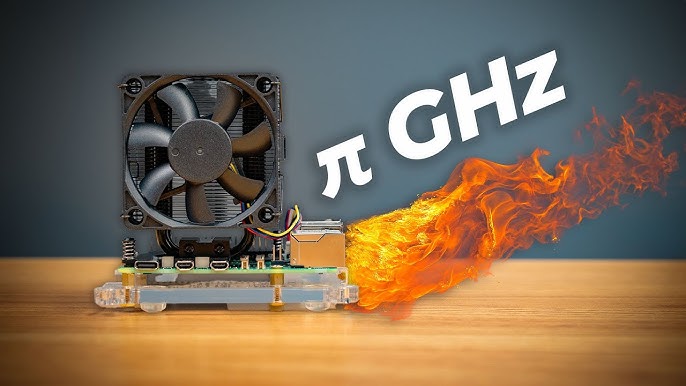
- Overclocking the Raspberry Pi: Overclocking can provide a noticeable performance boost, but ensure proper cooling.
Overclock Raspberry Pi 5 for Emulation
To overclock your Raspberry Pi 5 for emulation, you'll need to edit the config.txt file. This file is located in the /boot/firmware directory of your RetroPie installation. Open the file using a text editor, and add the following lines:
over_voltage=6
arm_freq=3000
gpu_freq=1000
Always be sure to monitor your Pi's temperature while overclocking.
Cost/Value Analysis: Is It Worth It?
The Raspberry Pi 5-based emulation station is a highly cost-effective solution compared to other retro gaming options.
Price Breakdown:
- Raspberry Pi 5: $80
- SanDisk Extreme Pro 512GB MicroSD card: $50
- Official Raspberry Pi 5 power adapter: $15
- RetroFlag NESPi 4 Case: $40
- 8BitDo Pro 2 Bluetooth Controller: $50
- Total Build Cost: Approximately $235
Why it's cost-effective:
- Versatility: Emulates a wide range of consoles.
- Affordability: Significantly cheaper than buying multiple original consoles or a high-end gaming PC.
- Community Support: A vast online community provides ample resources and support.
Alternative Options:
If your budget allows, consider a more powerful mini PC. These can handle more demanding emulators like PlayStation 2 and GameCube, but they also come with a higher price tag.
Tips and Tricks: Maximizing Your Retro Gaming Experience
Upgrade Paths
- Faster MicroSD card: Upgrading to an even faster MicroSD card can further improve loading times.
- Improved cooling: A more robust cooling solution allows for more aggressive overclocking.
Compatibility Notes
- Some emulators may require specific BIOS files. Ensure you have the correct files in the appropriate directories.
- Certain games may require specific emulator settings or even different emulator cores.
Pitfalls to Avoid
- Overheating: Always monitor your Raspberry Pi 5's temperature and ensure adequate cooling.
- Choosing incompatible components: Double-check that all components are compatible with the Raspberry Pi 5 and RetroPie.
- Improperly configuring emulators: Take the time to learn the ins and outs of each emulator to optimize performance and compatibility.
Setting up RetroPie on Raspberry Pi 5
- Download RetroPie: Download the latest RetroPie image for the Raspberry Pi 5 from the official RetroPie website: https://retropie.org.uk/
- Flash the image: Use a tool like BalenaEtcher to flash the RetroPie image to your MicroSD card.
- Insert the SD card: Insert the MicroSD card into your Raspberry Pi 5.
- Connect peripherals: Connect your controller, HDMI cable, and power adapter.
- Boot up: Power on the Raspberry Pi 5. RetroPie will automatically configure itself during the first boot.
- Configure controller: Follow the on-screen prompts to configure your controller.
- Add ROMs: Transfer your ROMs to the appropriate directories on the MicroSD card. You can do this via USB, SSH, or a network share.
- Enjoy!: Launch EmulationStation and start playing your favorite retro games.
Connecting to CRT TVs for Retro Gaming
Connecting your Raspberry Pi 5 to a CRT TV requires a bit of extra setup, but it's worth it for the authentic retro experience.
- Get the Right Cable: You'll need a composite video cable (red, white, yellow RCA connectors).
- Enable Composite Output: In RetroPie, navigate to the RetroPie Configuration menu, then Raspi-Config, then Display Options, and enable Composite Output.
- Connect the Cables: Connect the composite video cable to the Raspberry Pi 5 and the corresponding inputs on your CRT TV.
- Adjust Display Settings (Optional): You may need to adjust the display settings in RetroPie to optimize the image for your CRT TV.
Is Raspberry Pi 5 good for Retro Gaming?
Yes, the Raspberry Pi 5 is great for retro gaming, especially when combined with RetroPie. Its increased processing power and RAM allow for smoother emulation of a wide range of consoles, making it an excellent choice for retro gaming enthusiasts.
Conclusion: Your Retro Gaming Journey Begins
Building a retro gaming emulation station with a Raspberry Pi 5 is a rewarding project that combines technical skills with a passion for gaming history. By following this guide, you can create a versatile and affordable system that lets you relive your favorite classic games on both modern and vintage displays. So, grab your components, fire up your soldering iron (optional!), and prepare to embark on a nostalgic journey through the golden age of gaming. Ready to get started? Check out the SanDisk Extreme Pro 512GB MicroSD card on Amazon and begin your adventure today! SanDisk Extreme Pro 512GB MicroSD
VIRAL VIDEO SCRIPT: Retro Gaming Twist!
VIDEO START
(0:00-0:01) HOOK: Close-up shot of the RetroFlag NESPi 4 Case suddenly BURSTING open, revealing the Raspberry Pi 5 booting up with the RetroPie interface. Rapid focus. Sound: classic console power-up noise mixed with explosive burst.
(0:01-0:03) TWIST IMPACT: The RetroPie interface launches. Mario on the CRT TV JUMPS out of the CRT TV screen and onto the modern 4K screen. Slow-motion.
(0:03-0:07) SCENE - ORBIT: Camera RAPIDLY ORBITS around the brightly lit, retro-themed gaming setup. Showcases the NESPi case connected to a modern 4K TV and a vintage CRT TV simultaneously. The 8BitDo Pro 2 controller is featured prominently.
(0:07-0:10) SCENE - MODERN 4K: Camera focuses on the 4K TV screen. Mario continues his level, seamlessly running. Bright, vibrant colors.
(0:10-0:13) SCENE - CRT CLOSE-UP: Camera closes in on the CRT TV screen. Nostalgic VHS filter effect. Golden hour lighting on the CRT TV.
(0:13-0:15) SCENE - LOW ANGLE: Camera shows LOW-ANGLE shot emphasizing the overall setup, highlighting the CONTRAST between old and new technology.
(0:15-0:17) TWIST REPEAT: Mario on the 4K screen collects a star and does a victory jump. End with seamless gameplay on both screens.
(0:17-0:20) OUTRO: End screen showing XenGamer logo with text: "Relive the Classics. Evolved."
VIDEO END