Level Up Your Valley: A Deep Dive into Stardew Valley Modding Welcome, fellow farmers and adventurers!
Welcome, fellow farmers and adventurers! If you’re reading this on XenGamer.com, chances are you're not just content with tending your crops and befriending the villagers of Pelican Town. You're looking to expand your experience, delve deeper into the world, and craft a Stardew Valley that's uniquely yours. You've come to the right place. This is a comprehensive guide to modding Stardew Valley, focusing on adding substantial new content, intricate storylines, and a whole lot of customization. As a longtime member of the modding community, I'm here to share my knowledge and help you transform your gameplay. Let’s get started!
First things first: ensure you have a legitimate copy of Stardew Valley (Steam, GOG, or Xbox Game Pass for PC version – version 1.5.6 or later is highly recommended). We'll be using the Stardew Modding API (SMAPI) to enable our mods, so version 3.14.0 or later is necessary. You can find it here: https://smapi.io/. While not required, a Nexus Mods account is highly recommended for easier mod downloads. Finally, Vortex Mod Manager is optional, but it's a lifesaver when managing larger mod collections and load orders.
Installing SMAPI: The Foundation of Your Modded Valley
SMAPI, or Stardew Modding API, is the backbone of our entire operation. It allows mods to interact with Stardew Valley without directly altering the core game files. This keeps things clean and easily reversible.
- Download SMAPI: Head over to https://smapi.io/ and download the latest compatible version (3.14.0+).
- Run the Installer: Launch the downloaded installer executable.
- Automatic Detection: The installer will automatically detect your Stardew Valley installation directory.
- Create a Launch Option: Allow the installer to create a modified launch option for launching the game through SMAPI. This is what enables the mods. From now on, you need to launch the game using this SMAPI shortcut.
Manual Mod Installation: Getting Your Hands Dirty with Stardew Valley Expanded
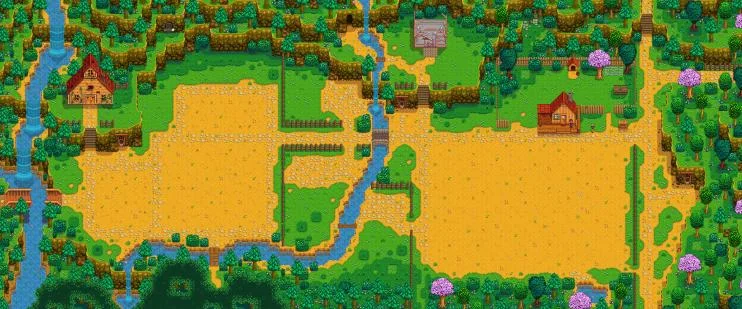
Let's walk through a practical example using the popular Stardew Valley Expanded (version 1.14.8). This is where the real fun begins!
- Download Stardew Valley Expanded: Go to Nexus Mods and download the most recent version of Stardew Valley Expanded (1.14.8).
- Extract the Files: Carefully extract the downloaded ZIP file to a temporary location on your computer.
- Identify Core Folders: Inside the extracted folder, you'll find the main "StardewValleyExpanded" folder, and its crucial prerequisite folders: "Content Patcher," "Json Assets," "SpaceCore," and "TMXL". These are essential for the mod to work correctly.
- Copy to the Mods Folder: Copy all of these folders (the main "StardewValleyExpanded" and the prerequisite folders) directly into the "Mods" folder located within your main Stardew Valley game directory. The "Mods" folder is in the same directory as the StardewValley.exe.
That’s it! Launch the game using the SMAPI shortcut, and Stardew Valley Expanded should be active.
Streamlining with Vortex Mod Manager (Optional, But Recommended)
Managing mods manually can become tedious, especially with a large collection. Vortex Mod Manager is a free tool that simplifies the process.
- Download and Install Vortex: Download and install Vortex Mod Manager from the Nexus Mods website.
- Connect to Nexus Mods: Launch Vortex and connect it to your Nexus Mods account. This allows for one-click downloads.
- Manage Stardew Valley: Within Vortex, navigate to the "Games" section and locate Stardew Valley. Vortex will now manage mods for this game.
- Download Mods: On Nexus Mods, use the "Mod Manager Download" button on a mod's page. Vortex will automatically download and install the mod files into the appropriate Stardew Valley "Mods" directory.
- Enable Mods: Activate each mod within Vortex to enable them. Vortex will take care of dependencies and conflicts, but remember load order is still key.

Load Order Management: The Key to a Stable Valley
Load order is absolutely crucial, especially when using mods that alter the same areas of the game. Mods are loaded in alphabetical order based on their folder name, however Vortex allows you to modify this easily.
- Establish a Baseline: As a general rule, place core mods like Content Patcher, SMAPI itself, and SpaceCore at the top. Then add significant content additions like Stardew Valley Expanded and Ridgeside Village. Smaller mods that introduce specific items or features should go last.
- Vortex's Drag-and-Drop: Use Vortex's intuitive drag-and-drop interface to rearrange mods according to this hierarchy.
- Avoid Renaming: Avoid manually renaming mod folders to influence load order, as this can cause instability and confusion. Vortex makes this unnecessary.
Troubleshooting: When Things Go Wrong
Modding isn't always smooth sailing. Here are some common issues and how to fix them.
- SMAPI Errors During Startup: If Stardew Valley fails to launch when using SMAPI, carefully examine the SMAPI console window for error messages.
- Outdated Mods: The most frequent cause is outdated mod versions or unmet dependencies. Ensure all mods are compatible with your current Stardew Valley version. Update SMAPI and your mods.
- Content Patcher Errors: Content Patcher is a vital dependency for many mods. Errors referencing Content Patcher usually mean a mod is trying to modify a file that doesn't exist or has an invalid path.
- Review Mod Documentation: Thoroughly check the affected mod's documentation, paying close attention to compatibility and installation instructions.
- Save Game Corruption (From Mod Removal): Removing extensive content mods mid-game, especially those adding new farm maps or NPCs, can corrupt your save.
- Back Up Your Saves: Always back up your saved game files before uninstalling mods. Stardew Valley saves are located in
%appdata%\StardewValley\Saves. Copy the entire contents of this folder to a safe location.
- Back Up Your Saves: Always back up your saved game files before uninstalling mods. Stardew Valley saves are located in
Extra Tips for a Polished Modded Experience
- Mod Configuration: Install the Generic Mod Config Menu mod. It allows you to easily fine-tune mod settings directly within the game, without editing complex configuration files.

- Compatibility is Key: Always read the "Posts" section on each Nexus Mods page to find potential compatibility issues and bug reports. Mods that significantly alter the same maps or NPC schedules are more likely to conflict.
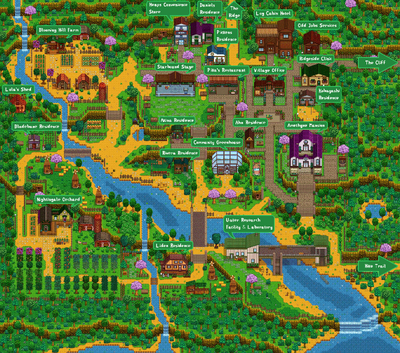
- Optimal Mod Combinations: Combining Stardew Valley Expanded (version 1.14.8) with Ridgeside Village (version 2.0.0) creates a sprawling, immersive world. Use the Lookup Anything mod to easily access information about new crops, items, and recipes.

- Strategic Testing: Install new mods individually to isolate potential issues. Only install multiple new mods together once you are confident that each one works alone. This will significantly reduce troubleshooting headaches.
Conclusion: Craft Your Perfect Valley
Modding Stardew Valley is a journey of discovery and customization. By following this guide, you can add incredible new content, personalize your gameplay, and create a Stardew Valley experience that’s truly your own. Remember to install SMAPI, manage your load order carefully, and back up your saves. Happy farming, and may your harvests always be bountiful! Now get out there and craft the valley of your dreams. Don't be afraid to experiment and explore the vast world of Stardew Valley mods. And always remember to check back on XenGamer.com for more modding tips and tricks!