Level Up Your Cyberpunk 2077: A XenGamer's Guide to Modding Night City.
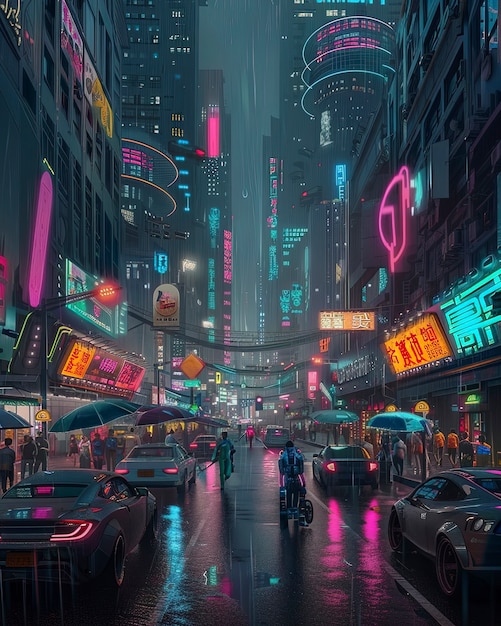
Night City. A sprawling metropolis teeming with life, grit, and… well, a whole lot of performance issues for some of us. Cyberpunk 2077 is a visually stunning game, no doubt, but getting it to run smoothly while looking its best can be a real challenge. Fortunately, the modding community has stepped up in a big way, offering tools and enhancements that can drastically improve both performance and visual fidelity. As a long-time Night City resident (virtually, of course), I'm here to guide you through the process of modding Cyberpunk 2077 to achieve the optimal balance of performance and eye-popping visuals. Let's dive in, choombas!
Essential Modding Tools
Before we get to the juicy visual upgrades, we need to install some essential modding tools. These are the backbone of a smooth and customizable Cyberpunk 2077 experience.
- Cyber Engine Tweaks: This is a must-have. It allows you to execute console commands, enable various performance tweaks, and even bypass certain game limitations.
- RED4ext: This is a code patcher which expands modding capabilities.
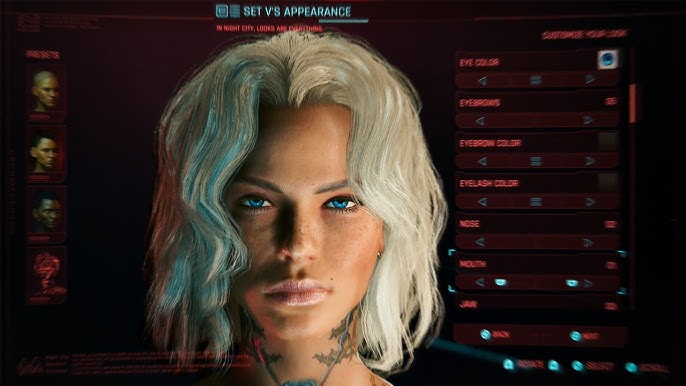
- Appearance Menu Mod: Want to tweak your V's look beyond what the base game offers? This mod is for you. It opens up a plethora of character customization options.
Step-by-Step Mod Installation Guide
Okay, let's get our hands dirty. Here's a detailed walkthrough of how to install these essential mods:
1. Installing Cyber Engine Tweaks
This is the first domino. Get this right, and the rest falls into place.
- Download the latest version of Cyber Engine Tweaks from Nexus Mods.
- Extract the downloaded archive to your Cyberpunk 2077 installation directory. This is the folder where you'll find the "Cyberpunk2077.exe" file.
- Launch the game. Cyber Engine Tweaks should automatically load. You can confirm this by pressing the tilde (~) key, which will open the console overlay.
2. Installing RED4ext
This one's even simpler.
- Download the latest version of RED4ext from Nexus Mods.
- Extract the contents of the archive to your Cyberpunk 2077 installation directory, just like you did with Cyber Engine Tweaks.
- That's it! No further configuration is needed.
3. Installing Appearance Menu Mod
Time to get that V looking sharp.
- Download the latest version of Appearance Menu Mod from Nexus Mods.
- Extract the contents of the archive into the "\Cyberpunk 2077\r6\plugins\RED4ext\plugins" directory. If these directories don't exist, create them. It's crucial to get the file path right.
- In-game, press F12 to open the Appearance Menu. Get creative!
4. Installing Optimized Texture Packs
Now, for the visual feast. We're going to install texture packs that enhance the detail of Night City without crippling performance. A great example is the work by "Halk Hogan PL" or similar texture upscalers. Always check the mod descriptions for compatibility notes.
- Download your chosen texture pack (for example, "Halk Hogan PL's Cyberpunk 2077 HD Reworked Project") from Nexus Mods.
- Extract the archive to the "\Cyberpunk 2077\archive\pc\mod" directory. Again, if the directory doesn't exist, create it. Crucially, each texture pack should have its own subdirectory to prevent conflicts.
- Verify that the file paths are correct: "\Cyberpunk 2077\archive\pc\mod[Texture Pack Name]*.archive".
Troubleshooting Common Issues
Modding isn't always smooth sailing. Here are some common problems and their solutions:
- Game crashes after updating Cyberpunk 2077: This is almost always due to outdated modding tools. Cyber Engine Tweaks and RED4ext are particularly sensitive to game updates. Check Nexus Mods for updated versions ASAP. Also, verify the integrity of your game files through Steam, GOG, or the Epic Games Launcher.
- Shader compilation issues (stuttering): This is a frequent headache. Delete the shader cache located in the Cyberpunk 2077 installation directory or in
%LOCALAPPDATA%\CD Projekt Red\Cyberpunk 2077\. This forces the game to recompile shaders, which often resolves stuttering. Make sure your graphics drivers are up to date, too! - Crashes in specific locations (e.g., near Lizzie's Bar): Some mods can conflict with specific game scripts. Try disabling recently installed mods one by one to identify the culprit. Check the comments section and mod compatibility lists on Nexus Mods; other users may have encountered the same issue.
Advanced Tweaks and Optimization
Want to push things even further? Here are some advanced techniques to squeeze every last drop of performance and visual quality out of Night City.
Config File Editing
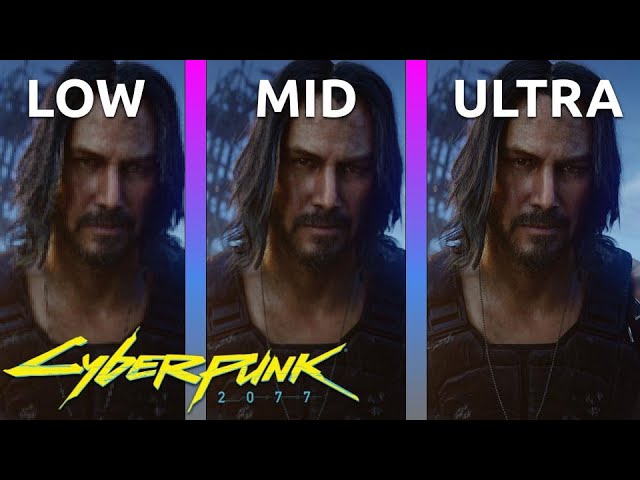
The "GraphicsSettings.ini" file (located in %USERPROFILE%\Documents\CD Projekt Red\Cyberpunk 2077\) is your friend. Open it with a text editor like Notepad++ or Visual Studio Code. Adjust settings like "TextureQuality" and "ShadowQuality" to fine-tune performance. Lowering these settings can significantly improve frame rates without drastically reducing visual quality. Experiment!
ENB Presets
ENB presets can dramatically alter the look of Cyberpunk 2077, adding advanced post-processing effects like improved lighting, shadows, and color correction. Explore ENB presets on Nexus Mods. Be warned: ENBs can heavily impact performance. Experiment with different presets to find one that balances visual enhancements with acceptable frame rates. Keep detailed notes on the performance impact of any ENB you add; what works for one person's rig might bring another to its knees.

Custom Character Presets
Leverage the Appearance Menu Mod to create your perfect V. Save your favorite presets for future playthroughs – no need to spend hours recreating that perfect look every time!
The Importance of Load Order
Managing your mod load order can solve many problems. While Cyberpunk 2077 is more forgiving than some games when it comes to load order, conflicts can still arise. If you're experiencing odd behavior or crashes, try these troubleshooting steps:
- Disable All Mods: Start by disabling all of your mods and see if the issue persists.
- Enable Mods One at a Time: Enable mods one by one, launching the game after each addition, to isolate the problematic mod.
- Check Mod Dependencies: Ensure you've installed all required dependencies for each mod.
- Look for Conflicts: Read the mod descriptions and comments on Nexus Mods to identify potential conflicts with other mods.
- Use a Mod Manager: Consider using a mod manager to help organize and manage your load order.
Staying Up-to-Date
The Cyberpunk 2077 modding scene is constantly evolving. New mods are released regularly, and existing mods are updated to improve performance, add new features, and fix bugs.
- Monitor Nexus Mods: Regularly check Nexus Mods for updates to your installed mods and new mods that might interest you.
- Read Mod Descriptions: Carefully read the descriptions of new mods before installing them to ensure they are compatible with your system and other mods.
- Follow the Community: Stay active in the Cyberpunk 2077 modding community on forums and social media to learn about the latest developments and get help from other modders.
The Future of Cyberpunk 2077 Modding
With the release of REDmod, CD Projekt Red has officially embraced modding in Cyberpunk 2077, providing modders with tools and resources to create even more ambitious and transformative mods. We can expect to see even more exciting developments in the Cyberpunk 2077 modding scene in the years to come, including:
- More sophisticated tools: REDmod will continue to evolve, providing modders with more advanced tools and features.
- Larger-scale mods: Modders will be able to create more complex and ambitious mods that significantly alter the game world, gameplay, and story.
- Official support: CD Projekt Red may provide official support for select mods, integrating them into the base game.
Conclusion: Your Night City, Your Way
Modding Cyberpunk 2077 is a journey. It takes some effort, but the rewards are well worth it. By following this guide, you can transform Night City into a visually stunning and smoothly running experience that's tailored to your preferences and hardware. So, go forth, experiment, and create your ultimate Cyberpunk 2077 adventure. Just remember to back up your game files before making any major changes, and always read the mod descriptions carefully! Happy modding, choombas!