From Dusty Planet to Galactic Tycoon: Building the Ultimate Activated Indium Empire in No Man's Sky Welcome, fellow industrialists, to XenGamer.
Welcome, fellow industrialists, to XenGamer.com's definitive guide on constructing a highly efficient, automated Activated Indium mining and distribution network in No Man's Sky (PC version). As a logistics manager with a… penchant for optimization, I've dedicated countless hours to perfecting this system. Forget haphazard resource gathering; we're building an empire, one perfectly calibrated extractor at a time.
Activated Indium, as you well know, is the shimmering lifeblood of the galactic economy. Its high sell value makes it the premier currency generator for aspiring tycoons. The goal here isn't just to acquire Activated Indium; it's to establish a self-sustaining system so robust that it practically runs itself, freeing you to pursue grander endeavors – like acquiring that S-Class freighter you've been eyeing.
Many players struggle with common pitfalls: power shortages crippling production, storage limitations halting the flow of resources, and inefficient transfer methods bottlenecking the entire operation. This guide eliminates those headaches, ensuring a smooth, profitable, and utterly satisfying experience.
Let's get started.
Step-by-Step Strategy: From Zero to Hero
- Planetary Selection: The Perfect Stage for Profit
The foundation of any successful Activated Indium empire is, naturally, the planet itself. We're looking for a specific combination of factors: a planet classified as "Extreme Sentinel Activity" coupled with an "Abundant" Activated Indium deposit situated near an Electromagnetic Hotspot. Why Extreme Sentinels? Because pressure breeds innovation, and it encourages us to consider base defense (even if optional). The Abundant Activated Indium deposit ensures high yield, and the Electromagnetic Hotspot provides clean, reliable power.
An example planetary scan screen showing the target parameters. Note the coordinates for the Electromagnetic Hotspot; these are crucial for base placement.
- Base Site Selection and Initial Setup (Base 1 – Mining Outpost): The Heart of the Operation
The placement of our mining outpost (Base 1) is paramount. Position the base computer as close as humanly possible to both the Activated Indium deposit and the Electromagnetic Hotspot. If a compromise must be made, prioritize proximity to the Activated Indium deposit; power can be routed further, but extraction efficiency is non-negotiable.
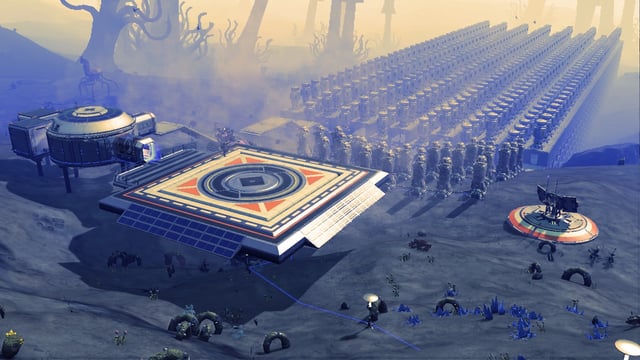
Construction: The initial build-out consists of ten Activated Indium Extractors, spaced evenly to maximize coverage of the deposit. This ensures that we are fully exploiting the resource node. Following the extractors, construct ten Storage Containers (Silos), linked together in a single chain. This provides a crucial buffer for continuous operation. Then, connect the Extractors to the Storage Containers using pipes, ensuring a closed and optimized resource flow.
A clean, schematic view of the ideal base layout. Note the even spacing of extractors and the streamlined pipe connections.
Power: Power the extractors using Electromagnetic Generators (EMGs) strategically placed within the Electromagnetic Hotspot. Always use sufficient EMGs to provide a substantial power buffer; running at capacity is inefficient and invites potential downtime. Connect the EMGs to the extractors and storage containers using wiring. I recommend a centralized power distribution node for cleaner, more manageable wiring. Strive to conceal wires within base structures for aesthetic optimization.
Clean and organized wiring is crucial for efficient power distribution and overall base aesthetics. Notice the hidden wires where possible.
- Base 2 – Teleportation Hub & Refinery (Central Processing): The Logistics Core
Our second base serves as a central processing and distribution hub. Ideally, this should be on a planet within the same system as the mining outpost. Proximity to a space station with favorable trading rates is an added bonus.
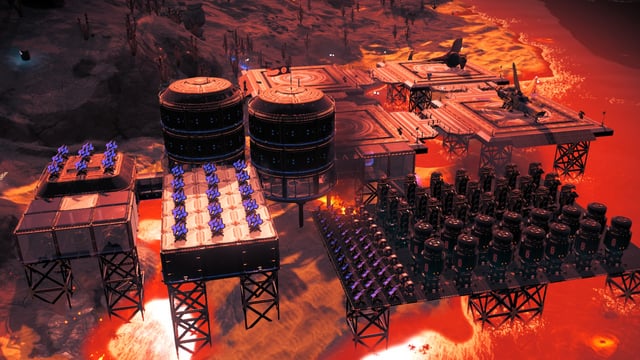
Construction: Construct a Teleporter to facilitate rapid transit between bases. Then, build twenty Refineries to process the raw Activated Indium. Finally, establish twenty Storage Containers (Silos), connected in a single chain, to hold the refined product. Connect the Teleporter and Storage Containers to a power source (solar panels or EMGs, depending on availability).

The Teleportation Hub and Refinery should be compact and efficient, prioritizing throughput.
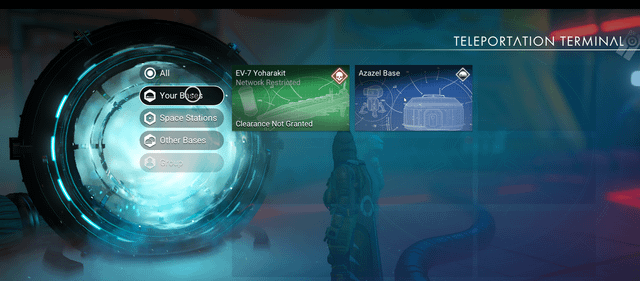
- Linking the Bases: Establishing the Supply Chain
Activate the teleporter at Base 1 (Mining Outpost) and designate it as the destination for the teleporter at Base 2 (Refinery Hub). This establishes the crucial link in our supply chain, allowing for seamless resource transfer.
- Expanding Production (Base 1): Maximizing Output
Return to Base 1 and build an additional ten Extractors and ten Storage Containers. Optimize: the optimal number of Activated Indium Extractors and Storage Containers depends on the mineral deposit's class. Generally speaking, an A-class deposit will require approximately 30 Extractors, while an S-Class deposit can support around 40. Accurate deposit analysis is key for maximum profitability.
- Freighter-Based Refining (Optional, But Highly Efficient): Mobile Processing Power
For those seeking peak throughput, I highly recommend leveraging your freighter's capabilities. Construct a trade terminal on your freighter for convenient selling. Using the Freighter’s matter beam technology, teleport all the Activated Indium aboard, refine it, sell it, then teleport back to the Activated Indium farm to restart the collection process. This bypasses planetary storage limitations and allows for continuous production.
III. Tips and Tricks: Honing Your Efficiency
Sentinel Defense (Optional): While Extreme Sentinel planets offer abundant resources, they also present a… minor security challenge. Building walls or placing defensive turrets around the mining outpost can deter Sentinels, though I personally find their patrols a negligible inconvenience.
Power Optimization: Employ power regulators to mitigate power surges and conserve energy. Prioritize power distribution to the extractors; they are the revenue-generating core of the operation.
Monitor your power grid statistics closely to ensure efficient energy usage.
Teleporter Placement: Optimize teleporter placement to minimize travel time between bases. Every second saved translates to increased throughput.
Save Editing for Bypass (Advanced): Use save editing at your own risk. Back up your save file before proceeding. Utilize a save editor (such as nomansskysaveeditor) to bypass base building limits. Locate the "BaseBuildingObjects" array in your save file and increase the value of the "MaxObjectCount" field. This allows you to fully exploit the Activated Indium deposit and maximize production, exceeding the normal base building constraints. This is strictly for those seeking to maximize their ROI, and only after a full risk assessment.
Editing the "MaxObjectCount" field allows you to bypass building limits.
PC-Specific Notes:
- Controls: Rebind the 'Interact' key to mouse wheel click for rapid resource gathering.
- Settings: Lower terrain tessellation for improved performance on planets with complex geometry.
- Mods: Consider using mods that improve base building functionality or increase the building limit.
- Performance Tweaks: Adjust graphics settings to maintain a stable framerate, especially when near large bases. Monitor CPU and GPU usage to identify bottlenecks.
- Common Mistakes to Avoid: Underestimating power requirements, failing to plan teleporter logistics, ignoring storage capacity, and, of course, spaghetti wiring.
Avoid the chaos of spaghetti wiring. A well-organized base is an efficient base.
IV. Conclusion: The Fruits of Your Labor
Congratulations! You have successfully established a highly efficient, automated Activated Indium mining and distribution network. The benefits are manifold: passive income generation, drastically reduced resource gathering time, and a stable, robust galactic economy.
You have unlocked economic independence, the ability to acquire high-end ships and upgrades, and the freedom to explore the galaxy without the constant worry of resource constraints. More importantly, you've unlocked the satisfaction of building a finely tuned, self-sustaining system – a testament to the power of optimization.
Looking ahead, there are further opportunities for expansion. After maximizing Activated Indium production, consider diversifying into NipNip farming for additional galactic credits. Furthermore, building a fleet of frigates will enable you to passively collect valuable resources from across the No Man's Sky universe, further augmenting your wealth.
The universe is vast, and the opportunities are endless. Go forth and conquer!
