DRG Driller Solo Hazard 4 Mining Expedition Guide: Fungus Bogs Survival So, you think you've got what it takes to solo a Hazard 4 Mining Expedition as the Driller in the Fungus Bogs?

So, you think you've got what it takes to solo a Hazard 4 Mining Expedition as the Driller in the Fungus Bogs? Buckle up, miner, because you're in for a world of hurt – and a whole lot of fun. As a seasoned Deep Rock Galactic player, I'm here to guide you through the treacherous terrain, relentless swarms, and unique challenges this mission throws at you. The Driller is uniquely suited to this hellish landscape, thanks to his unmatched terrain manipulation and crowd control. But Hazard 4 solo? That's a different beast altogether. This guide is your key to successfully navigating the Fungus Bogs and emerging victorious. Let's get drilling!
Context: Mining Expeditions in the Fungal Mire
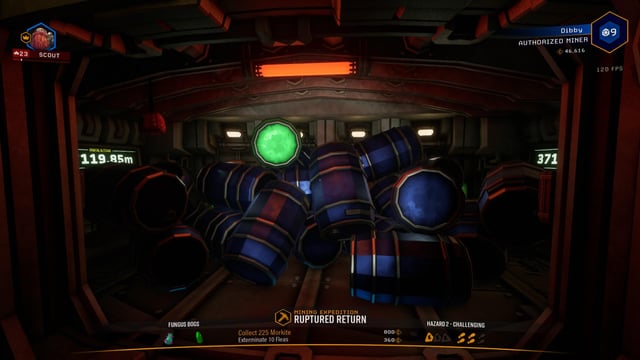
Mining Expeditions in Deep Rock Galactic task you with extracting a set amount of Morkite from the depths. The Fungus Bogs biome adds layers of complexity with its explosive fungal growths, corrosive slime, and visibility-reducing fog. The Driller shines here. He carves efficient paths through the caves, bypassing hazardous terrain, and uses his Cryo Cannon to freeze swarms in their tracks. A solo run cranks up the pressure. You're on your own with Bosco for support, making resource management and strategic positioning crucial.
Step-by-Step Strategy: Drilling to Victory
Here's a detailed, turn-by-turn guide to conquer this challenge.
Initial Drop & Cave Assessment
As soon as your boots hit the ground, take a moment to survey your surroundings. Use your laser pointer to scout the initial cave system. Look for:
- Morkite Veins: The primary objective. Identify clusters and their proximity to each other.
- Secondary Objectives: Aquarqs, Eggs, Gunk Seeds, etc. Note their locations for efficient gathering later.
- The Mine Head: Its location dictates your overall strategy. Is it easily accessible, or buried deep within the cave system?
Once you have a rough mental map, it's time to get drilling. The Driller's drills are your best friend. Use them to:
- Create Direct Paths: Bore straight towards the Mine Head, ignoring winding tunnels and potential ambush points. Efficiency is key.
- Bypass Hazards: Drill around pools of corrosive slime and unstable fungal growths, minimizing risk.
- Establish Escape Routes: Create tunnels that serve as quick getaways during swarms.
Resource Gathering and Terrain Management
Now comes the grunt work: mining Morkite. The Driller's drills are invaluable for this.
- Optimal Mining Tunnels: Drill wide, flat tunnels around Morkite veins. This allows for easy movement and prevents you from getting cornered during swarms.
- Cryo Cannon for Interruption: Use the Cryo Cannon to freeze incoming enemies while you're mining. A short burst is often enough to buy you precious seconds.
- Secondary Objective Efficiency: Delegate Bosco to mine hard-to-reach Aquarqs or Eggs. Focus on Morkite, and let Bosco handle the rest.
Resource management is paramount in a solo Hazard 4 run.
- Fuel and Ammo Discipline: Don't waste fuel or ammo. Use short bursts with the drills and Cryo Cannon, and prioritize targets during swarms.
- Flare Placement: Illuminate key areas, especially around Morkite veins and potential ambush points. Good visibility is crucial for survival.
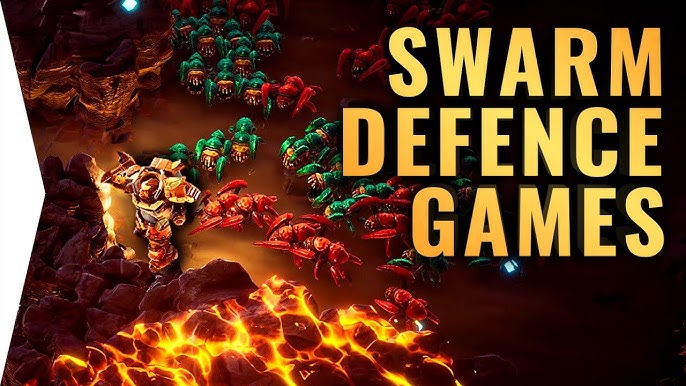
Swarm Defense
Hazard 4 swarms are relentless. The Cryo Cannon is your primary weapon.
- Cryo Cannon Optimization: Prioritize mods that increase freeze rate and ammo capacity. The faster you can freeze enemies, the better.
- Priority Targets: Eliminate Spitters, Web Spitters, and Menaces first. Their ranged attacks can quickly deplete your health.
- Kiting Techniques: Use your drills to create escape routes and kite enemies through chokepoints. Freeze them as they funnel through, maximizing your Cryo Cannon's effectiveness.
Escape Strategy
Once you've hit the Morkite quota, it's time to bug out.
- Rapid Escape Route: Use your drills to create a direct tunnel back to the Drop Pod. Ignore any remaining Morkite – survival is paramount.
- Leftover Enemies: Freeze any enemies that give chase, but don't engage in prolonged firefights. Your goal is to reach the Drop Pod alive.
- Prioritize Survival: Use your drills to quickly navigate to the Drop Pod.
Tips and Tricks: Mastering the Driller
Here are some advanced techniques to elevate your Driller gameplay.
Cryo Cannon Efficiency
- Short Bursts vs. Sustained Streams: Use short bursts to freeze smaller enemies and sustained streams to freeze larger targets like Praetorians and Oppressors.
- Body Part Targeting: Aim for the head of larger bugs to freeze them faster.
- Optimal Distance: Engage enemies from mid-range to maximize your freeze rate and minimize the risk of taking damage.
Drill Usage
- Fuel Conservation: Use short, controlled bursts with the drills to minimize fuel consumption.
- Swarm Escapes: Drill through walls to quickly flank enemies or create escape routes.
- Flanking Maneuvers: Surprise enemies by drilling through walls and attacking from unexpected angles.
Fungus Bog Specifics
- Explosive Fungal Growths: Use your drills to clear a path around them or freeze enemies near them to trigger chain reactions.
- Corrosive Slime: Drill around pools of slime or use your drills to create elevated platforms.
- Limited Visibility: Rely on your flares and map awareness to navigate the fog.
Solo Play Adjustments
- Resource Management: Be extra mindful of your ammo and fuel. Every shot and drill counts.
- Strategic Positioning: Always be aware of your surroundings and position yourself to minimize the risk of being surrounded.
- Bosco Optimization: Utilize Bosco's abilities to mine, defend, and revive you. Upgrade him with the revive perk for increased survivability.
Hazard Level 4 Strategies
- Increased Enemy Spawn Rates: Be prepared for constant swarms and prioritize crowd control.
- Increased Enemy Damage: Avoid taking unnecessary risks and focus on dodging attacks.
- Aggressive AI: Enemies will actively try to flank and surround you. Use your drills to maintain control of the battlefield.
PC-Specific Notes: Optimization for Peak Performance
Here are some tips for optimizing your Deep Rock Galactic experience on PC.
Control Optimization
- Cryo Cannon Sensitivity: Adjust your mouse sensitivity for precise aiming with the Cryo Cannon.
- Drill Control: Bind your drill activation to an easily accessible key for quick and responsive drilling.
- Weapon Switching: Assign custom keybindings for fast weapon switching.
Performance Tweaks
- Shadow Quality: Reduce shadow quality to improve performance.
- Lighting Quality: Lower lighting quality to reduce the strain on your GPU.
- Effects Quality: Reduce effects quality to minimize particle effects, which can impact performance in the Fungus Bogs.
Consider disabling subsurface scattering for a noticeable performance boost without sacrificing too much visual fidelity. Find the balance to retain visual fidelity and good frame rates.
Mods (Optional)
For solo play, consider these verified and approved mods:
- UI Enhancements: Mods that improve resource tracking or provide better enemy awareness.
- Improved Bosco AI: Mods that enhance Bosco's responsiveness and effectiveness.
Conclusion: A Driller's Triumph
Successfully completing a Mining Expedition as the Driller on Hazard Level 4 in the Fungus Bogs is a significant achievement. You'll earn experience points, credits, and resources. More importantly, you'll gain a sense of accomplishment from conquering one of Deep Rock Galactic's most challenging scenarios. The next step? Experiment with different weapon builds, refine your drilling techniques, and push your skills to the limit. Rock and Stone!