Cyberpunk 2077 Modding: A Noob-Friendly Guide to Night City Customization (XenGamer.

So, you're ready to dive headfirst into the neon-drenched world of Cyberpunk 2077 modding? Excellent choice, choomba! Night City is vast and visually stunning, but with a little bit of elbow grease and the right mods, you can transform it into your Night City. This guide will walk you through the essentials of modding CD Projekt Red's sprawling RPG, from initial setup to troubleshooting common problems. We'll cover installing mods, managing load orders (crucial!), optimizing performance, and exploring the awesome variety of modifications available. Whether you're looking for a complete graphics overhaul, tweaked gameplay mechanics, or brand-new content, this guide will give you the tools you need. Let's get started!
Overview: What is Modding Anyway?
Modding, short for "modification," allows players to alter a game beyond its original design. Think of it as customizing your ride, but instead of chrome rims and a new paint job, you're adding enhanced textures, new quests, or completely rebalancing the combat system.
There are two primary categories of mods:
- Visual Mods: These tweak the game's appearance. This includes things like texture upgrades (making surfaces look sharper), lighting enhancements (making Night City even more dazzling), and character model replacements.
- Mechanical Mods: These alter gameplay elements. This can range from simple tweaks like increased carrying capacity to more complex changes like overhauling the perk system or adding new enemy types.
Why mod? Simple: to personalize your experience. Maybe you want a more immersive world, a tougher challenge, or just to fix some nagging bugs. The possibilities are endless.
Requirements: Gearing Up for Modding
Before you start downloading mods like crazy, you'll need a few essential tools and resources:
A Legit Copy of Cyberpunk 2077: This should be obvious, but you need the game installed on your PC, preferably through Steam, GOG, or Epic Games Store.
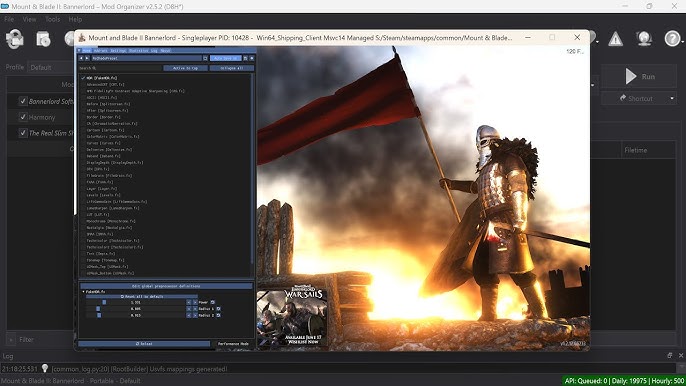
A Mod Manager (Highly Recommended): While you can install mods manually, a mod manager makes the process much easier and safer. I recommend Mod Organizer 2 (MO2). It's a powerful tool that keeps your game files clean by creating a virtual file system. Vortex is another popular option, especially for beginners, and is created by Nexus Mods.
Download MO2: You can find it on the Nexus Mods website (linked below). You'll need a Nexus Mods account (free is fine for most users) to download files.
Download Vortex: Also available on Nexus Mods.
Cyber Engine Tweaks (CET): This is an ASI plugin that allows running Lua scripts and enables various in-game tweaks and features. Many mods require CET to function properly. Get it from Nexus Mods.
RED4ext: A framework for C++ plugins, and required by many modern Cyberpunk 2077 mods. Download it from Nexus Mods.
REDMod: CD Projekt Red's official modding tool. It's required for some mods, especially those that add new content. REDMod is usually installed through the game launcher (GOG Galaxy or Steam).
Nexus Mods Account: Essential for downloading the vast majority of mods. Sign up for a free account at Nexus Mods.
Backup Your Game Files! This is crucial. Before you install any mods, create a backup of your entire Cyberpunk 2077 game directory. This will save you a lot of headaches if something goes wrong.
PC Specs: While the base game is relatively well-optimized, some graphics-intensive mods can put a strain on your system. Make sure your PC meets the recommended (not minimum) specifications for Cyberpunk 2077, and ideally exceeds them if you plan on using high-resolution texture packs or ENB presets. A beefy GPU (Nvidia RTX 3070 or AMD RX 6700 XT or better) and 16GB+ of RAM are recommended for heavily modded setups.
Step-by-Step Instructions: Modding Like a Pro
Alright, let's get down to business. I'll primarily focus on using Mod Organizer 2 (MO2) because it's the superior option for keeping your game clean. The general principles apply to Vortex as well.
Install Mod Organizer 2: Download the installer from Nexus Mods and run it. During installation, MO2 will ask you to choose a "portable" or "global" instance. Choose "portable." This keeps MO2's files separate from your game directory, which is cleaner. MO2 will also ask you to manage a game, choose Cyberpunk 2077.
Configure MO2:
- Run MO2. It might prompt you to locate your Cyberpunk 2077 installation directory. Point it to the correct folder (usually
C:\Program Files (x86)\Steam\steamapps\common\Cyberpunk 2077). - Configure the Archives tab. In MO2 settings, go to Archives. Add .archive as an archive type, and select "unzip single files" as the extraction method.
- Run MO2. It might prompt you to locate your Cyberpunk 2077 installation directory. Point it to the correct folder (usually
Install Cyber Engine Tweaks, RED4ext, and REDMod
- Install Cyber Engine Tweaks and RED4ext manually by extracting their contents to the Cyberpunk 2077 installation folder.
- REDMod should be automatically installed through your game launcher.
Download Mods from Nexus Mods: Browse Nexus Mods for Cyberpunk 2077 mods that pique your interest. Pay close attention to the mod descriptions, requirements, and compatibility notes.
Install Mods with MO2:
- Click the "Download with Manager" button on the Nexus Mods page. This will automatically send the mod file to MO2.
- Alternatively, you can manually download the mod file and then drag and drop it into MO2's download window (the top left panel).
- Once the mod is in MO2, double-click it to install it. MO2 will create a separate folder for the mod within its virtual file system.
Activate Mods: In MO2's left panel (the mod list), check the box next to each mod you want to enable.
Load Order: This is where things get a little tricky, but it's crucial for preventing conflicts. The order in which mods load can significantly impact how they interact with each other. Use LOOT (Load Order Optimisation Tool) to automatically sort your load order.
- Install LOOT: Download LOOT from its official website (linked below).
- Run LOOT through MO2: Configure MO2 to run LOOT as an executable. This ensures that LOOT correctly updates MO2's load order.
- Run LOOT: Click the "Sort" button in LOOT. It will analyze your mods and suggest an optimal load order. Apply the changes in MO2.
Run the Game: Launch Cyberpunk 2077 through MO2. This ensures that MO2's virtual file system is active, and your mods are loaded.
Troubleshooting: Fixing Common Modding Issues
Even with careful planning, you might run into problems. Here are some common issues and how to fix them:
- Game Crashes After Installing a Mod: This is usually due to a conflict or a missing dependency. Disable the last mod you installed and see if the game runs. If it does, that mod is likely the culprit. Check the mod's description page for any required dependencies (other mods it needs to function).
- Conflicts Between Mods: Two mods might try to alter the same game files, leading to unexpected behavior. LOOT can often detect conflicts, but sometimes you'll need to resolve them manually. Try changing the load order of the conflicting mods. If that doesn't work, you might need to create a custom patch (more on that later).
- Texture Issues (Missing Textures, Purple Textures): This usually means a texture file is missing or corrupted. Reinstall the mod, or check if it requires a specific base game texture.
- Performance Problems (Frame Rate Drops): Graphics mods, especially high-resolution texture packs and ENB presets, can significantly impact performance. Try disabling some graphics mods or lowering your in-game graphics settings.
- Infinite Loading Screens or Save Game Corruption: This is a serious issue. It can be caused by a faulty mod or a corrupted save file. Try disabling recently installed mods. If that doesn't work, you might need to revert to an earlier save game (hopefully, you made backups!).
- Identifying the Problematic Mod: The process of disabling mods one by one to find the culprit is often called the "binary search" method. Disable half your mods, then test. If the problem is gone, the issue was in the disabled half. If the problem persists, the issue is in the enabled half. Repeat this process until you find the single mod causing the problem.
- Reading Mod Manager Logs: MO2 and Vortex keep logs that can provide valuable clues about errors. Learn how to access and interpret these logs. They often contain error messages that can pinpoint the source of the problem.

Extra Tips: Taking Your Modding to the Next Level
Ready to go beyond the basics? Here are some advanced tips:
- Console Commands: Cyberpunk 2077 has a powerful console that allows you to tweak various game settings, spawn items, and even debug mods. You'll need Cyber Engine Tweaks installed to access the console.
- Merging Mods: You can merge multiple small mods into a single archive to reduce your load order size. This can improve performance and reduce the risk of conflicts. There are tools available for merging mods, but be careful, as it can be complex.
- Recommended Mod Combinations: Some mods are designed to work together. Look for "mod lists" or "collections" on Nexus Mods for curated sets of mods that enhance specific aspects of the game.
- Performance Optimization Mods: Mods like Optimized Mesh Navigation and Better Performance can significantly improve performance, especially on lower-end systems.
- Creating Custom Patches: If two mods conflict, you can create a custom patch to resolve the conflict. This involves editing the conflicting files to ensure that both mods work correctly. This is an advanced technique that requires some knowledge of modding tools and game files.
- Creating Your Own Mods: If you're feeling ambitious, you can create your own mods using REDMod, CD Projekt Red's official modding tool. It allows you to create new content, edit existing assets, and even script new gameplay mechanics.
Ethical Considerations: Mod Responsibly
Modding is a fantastic way to enhance your gaming experience, but it's important to do it ethically:
- Respect Mod Authors' Terms of Use: Always read the mod description carefully and respect any restrictions the author has placed on their work.
- Avoid Redistributing Copyrighted Content: Don't upload or share mods that contain copyrighted material without permission.
- Properly Credit Mod Authors: If you use someone else's work in your own mods, give them proper credit.
Conclusion: Your Night City, Your Rules
Modding Cyberpunk 2077 can seem daunting at first, but with the right tools and a little patience, you can transform Night City into the ultimate cyberpunk playground. Remember to back up your files, use a mod manager, pay attention to load orders, and troubleshoot any issues that arise. Most importantly, have fun and experiment! Your Night City awaits. Now get out there and make it your own, choomba!
Helpful Links:
- Nexus Mods: https://www.nexusmods.com/
- Mod Organizer 2: https://www.nexusmods.com/skyrimspecialedition/mods/6194 (Yes, it says Skyrim, but MO2 supports multiple games)
- Vortex: https://www.nexusmods.com/about/vortex/
- LOOT: https://loot.github.io/