Conquer Phrike: A Returnal PC Boss Guide for XenGamers Welcome, XenGamers, to your definitive guide on conquering Phrike, the first major hurdle in Returnal, now available on PC!

Welcome, XenGamers, to your definitive guide on conquering Phrike, the first major hurdle in Returnal, now available on PC! Many of you are seasoned roguelike veterans, familiar with permadeath and the grind. But Returnal throws a unique blend of bullet-hell intensity and relentless aggression into the mix. And let's be honest, the PC port, while beautiful, can be demanding. You're likely here because Phrike is giving you a hard time. Don't worry, you're not alone. This guide, coming from a seasoned Returnal player, will break down Phrike's attack patterns, optimal strategies, and PC-specific tweaks to ensure your victory.
Consider Phrike a difficulty of 7/10. Be prepared to dedicate around 3-5 hours of dedicated practice to truly master this fight. It’s a challenging but rewarding experience that will solidify your understanding of Returnal's core mechanics. Let’s dive in!
Phrike: The Guardian of the Overgrown Ruins
Phrike is found at the end of the Overgrown Ruins, the first biome on the haunting planet of Atropos. The biome is a rain-soaked, decaying alien jungle, filled with hostile creatures lurking amidst ancient structures. The boss arena itself is a multi-tiered, circular platform with crumbling pillars providing minimal cover. It's designed to keep you moving and constantly engaged.
Returnal isn’t just about combat; it's about piecing together the narrative. Phrike serves as a resurrected guardian, protecting the secrets of Atropos and Selene’s past. The fight progresses through three distinct phases, each marked by increased aggression and new attack patterns, signaled by a change in her eye color: yellow, orange, then red.
Decoding Phrike's Assault: Attack Patterns and Strategies
Phrike's attacks are telegraphed, but they come fast and relentlessly. Mastering the timing of your dodges is crucial.
Phase 1 (Yellow Eyes):
- Triple Projectile Volley: Phrike screeches and fires three projectiles in a spread. Dodge Strategy: Sidestep or dash perpendicularly to the projectiles. A single dash will usually suffice.
- Ground Slam: Telegraphed by Phrike raising her arm. Dodge Strategy: Dash backward at the last second, when her arm is at its highest point. The timing is key to activating your I-frames (invincibility frames) during the dash.
- Dash Attack: Phrike charges towards you. Dodge Strategy: Dash sideways through her as she initiates the dash. This allows you to reposition behind her and potentially get some shots in.
Phase 2 (Orange Eyes):
- All Phase 1 attacks, but faster and more frequent.
- Projectile Barrage: A rapid-fire stream of projectiles. Dodge Strategy: Requires constant movement and a series of short dashes. Prioritize dodging over attacking during this barrage.
- Blue Melee Attack: A sweeping melee attack, telegraphed by a blue glow. Dodge Strategy: Dash backwards with precise timing when the blue energy lashes out.
Phase 3 (Red Eyes):
- All Phase 1 and 2 attacks, even faster and more aggressive.
- Overhead Slam: A devastating attack with a large AOE (Area of Effect), marked by a red glow on the ground. Dodge Strategy: This requires precise timing. Dash backward as she brings her arms down to slam the ground. The teleporters can also be used to quickly reposition and avoid the AOE.
- Red Melee Attack: A leaping melee attack, telegraphed by a red glow. Dodge Strategy: Dash backwards with precise timing when the red energy lashes out.
Movement is Life: Mastering Dodging and I-Frames
Returnal isn't just a shooter; it's a dance of death. Your dash is your lifeline. It grants you brief invincibility frames (I-frames) that allow you to pass through enemy attacks unharmed. Mastering the timing of your dashes is paramount.
For better control, consider remapping the dash to L1 (shoulder button) on your controller. This allows you to dash more frequently and fluidly without taking your thumb off the movement stick.
Choosing Your Weapon: Proficiency and Traits
Weapon proficiency is crucial. Prioritize increasing it to level 5 or higher before facing Phrike. This unlocks higher damage weapon traits that can significantly impact the fight. Two weapons stand out as excellent choices:
- Hollowseeker: Its high rate of fire allows for a constant stream of damage, making it easy to hit Phrike even when she's moving erratically.
- Tachyomatic Carbine: Its high damage per shot can quickly deplete Phrike’s health bar, especially if you can consistently land critical hits.

Weapon traits are key. "Shredding Rot" (damage over time) and "Homing" (projectiles track enemies) are particularly effective against Phrike. The "Shredding Rot" will continue to damage the boss even when you are focused on dodging. Homing projectiles will take advantage of openings that are difficult to hit using typical aiming.

Exploiting Weaknesses and Mastering Phase Transitions
Phrike's head and back are weak points. Focus your fire on these areas to maximize damage. When she pauses to charge an attack, use this opportunity to unload as much damage as possible. Staggering her provides brief windows for critical hits.
Phrike will kneel and emit a large energy burst when transitioning between phases. Use this window to reload, reposition, and prepare for the new attack patterns. The arena will change by removing previously accessible platforms as the phases progress, limiting your movement options.
Tips and Tricks for Survival
- Resource Management:
- "Adrenaline Leech" (restores health on adrenaline gain) is invaluable for sustained healing.
- "Shield Vial" provides a temporary shield, giving you a buffer against mistakes.
- "Energy Bar" increases your maximum energy, allowing you to use your dash more frequently.
- "Resinous Shield" provides extra protection.
- "Increased Damage at the cost of suit integrity" can be a worthwhile tradeoff if you are confident in your dodging skills, but only if the suit integrity decrease is manageable.

- Arena Awareness: Constantly be aware of the arena layout. Use verticality to your advantage by grappling to different levels. The teleporters allow for quick repositioning across the arena, especially when dodging the "Overhead Slam" in Phase 3.
Advanced Tactics: "Bunny hopping" (repeatedly jumping while moving) can provide a slight speed boost and make you harder to hit. Master the grapple hook for quick escapes and repositioning.
Common Mistakes: Avoid getting greedy with attacks, as this leaves you vulnerable. Mistiming dodges will result in heavy damage. Neglecting to manage your Adrenaline level (which boosts weapon damage and other stats) will severely hamper your damage output.
Difficulty Adjustment: To make the fight easier, spend time grinding for better artifacts and consumables in the earlier sections of the biome. To make the fight harder (for experienced players seeking a challenge), intentionally limit your equipment and weapon choices.
PC-Specific Optimization: Fine-Tuning for Victory
The PC port of Returnal is stunning, but it can also be demanding. Here's how to optimize your settings for a smoother experience:
- Controller vs. Mouse & Keyboard: While both control schemes are viable, a controller generally offers better analog movement and more intuitive dodging. For controller, re-map the dash to L1 and the alt-fire to R1 for faster access. Avoid mapping crucial actions to the face buttons (X, Square, Circle, Triangle) to prevent thumb fatigue. For mouse and keyboard, ensure the key binds for dash, jump, and interact are easily accessible and comfortable. Consider using a gaming mouse with customizable buttons for weapon switching and alt-fire. Controller brands like the Xbox Elite Wireless Controller are recommended for their customizability.
- DLSS Optimization: DLSS (Deep Learning Super Sampling) can significantly improve performance without drastically sacrificing visual quality.
- DLSS Quality: Provides the best visual fidelity with a moderate performance boost.
- DLSS Balanced: Offers a good balance between visual quality and performance.
- DLSS Performance: Prioritizes performance, but may introduce some visual artifacts.
- DLSS Ultra Performance: Maximizes performance but results in noticeable visual degradation.
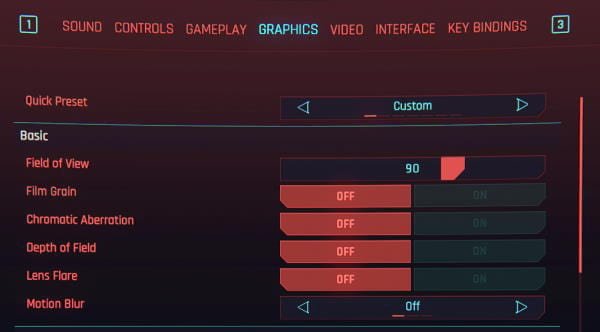
Graphical Settings Optimization: Adjust shadow quality to "Medium" or "Low" and disable Ambient Occlusion to gain a significant performance boost without drastically impacting visual quality. Lowering reflection quality is a similar way to make up the FPS you need. An RTX 3070 can achieve a stable 60 FPS at 1440p with DLSS Quality and these settings.
Mod Recommendations: Check Nexus Mods for any community-created performance-enhancing or control customization mods.
Input Lag Reduction: Disable V-Sync and set pre-rendered frames to 1 in your graphics card control panel to minimize input lag. Lowering the display refresh rate could assist as well.
Triumph and Reward: What Victory Unlocks
By defeating Phrike, you unlock access to Biome 2 (Crimson Wastes) and gain a new weapon: the Thermogenic Launcher. This victory progresses the main story, revealing more about Selene’s past and the mysteries of Atropos.
You also receive approximately 1000 Obolites and unlock the Forge in the Overgrown Ruins, allowing you to purchase pre-run artifacts, granting you a crucial edge on subsequent cycles.
Most importantly, overcoming Phrike is a significant milestone that demonstrates mastery of Returnal's core gameplay mechanics. It prepares you for the future challenges of Act 1 by reinforcing the importance of movement, weapon proficiency, and resource management. The sense of accomplishment is palpable, knowing you've conquered one of the game's toughest early challenges. Now go forth, XenGamers, and break the cycle!