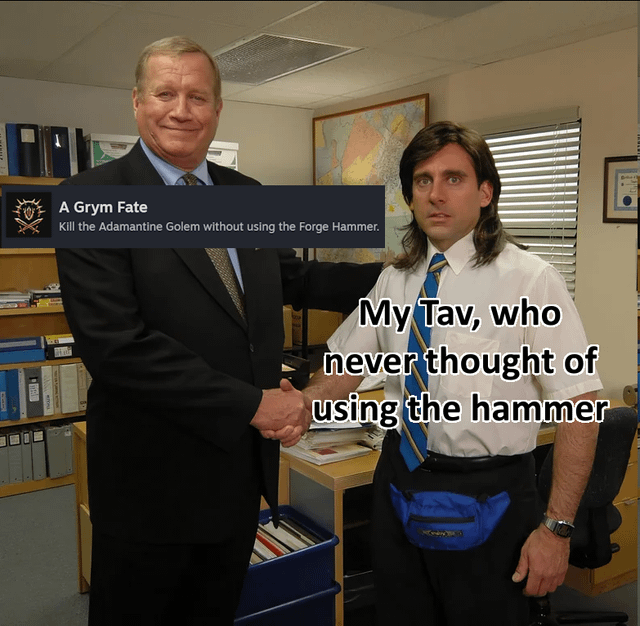
Conquer Grym: A Baldur's Gate 3 Adamantine Forge Domination Guide The Adamantine Forge in Baldur's Gate 3 is more than just a place to craft powerful gear; it's a crucible where your tactical prowess is truly tested.
The Adamantine Forge in Baldur's Gate 3 is more than just a place to craft powerful gear; it's a crucible where your tactical prowess is truly tested. At the heart of this forge lies Grym, the Adamantine Golem – a formidable foe that can easily wipe out an unprepared party. But fear not, fellow adventurers! This comprehensive guide, crafted by a seasoned Baldur's Gate 3 player, will arm you with the knowledge and strategies you need to crush Grym and claim the Forge's treasures. We'll delve into the mechanics, exploit Grym's AI, and explore various party compositions to ensure your victory.
Understanding the Adamantine Forge
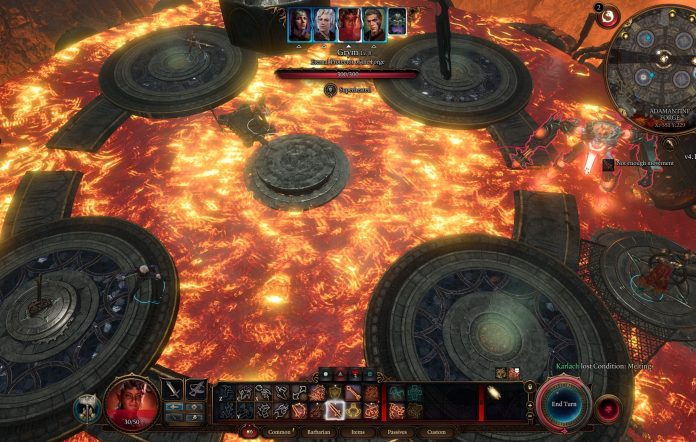
The Adamantine Forge is located deep within the Grymforge, accessible either through the Underdark or by navigating the perilous Grymforge region. This area is a nexus of ancient dwarven machinery, dominated by a massive forge powered by lava. The Forge itself is controlled by two crucial levers: one that raises and lowers the central platform, and another that controls the flow of lava into the arena. Keep an eye out for the Lava Mephits that patrol the area; dealing with them proactively will make the Grym fight significantly easier. Understanding the levers and the overall layout of the arena is the first step towards victory.
Decimating Grym: A Step-by-Step Strategy
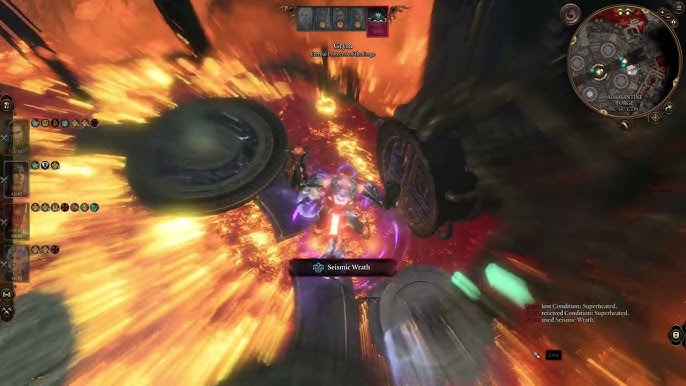
Grym is immune to almost all forms of damage unless he is Superheated. This is the key to defeating him.
Mastering the Forge Mechanics
The core mechanic of this fight revolves around using the Forge Hammer to inflict the Superheated condition on Grym. Here's how it works:
- Lava Infusion: Grym needs to be standing in lava to become vulnerable. Use the lava valve lever to flood the arena floor around the central platform.
- Strategic Positioning: Lure Grym onto the central platform while it's covered in lava. More on that later.
- Hammer Time: Once Grym is Superheated, use the forge hammer lever to bring the hammer down on him. This will deal massive damage.
Repeat this process until Grym is defeated. Sounds simple, right? The devil is in the details.
Positioning and Aggro Management: The Art of the Tank
Grym's AI is relatively straightforward: he will almost always target the last character who attacked him. This is crucial for controlling his positioning.
- The Tank: Designate a character with high AC (Armor Class) as your "tank." Equip them with heavy armor, a shield, and any items that boost their survivability. Good candidates include Fighters, Paladins, or even a heavily armored Cleric. Their primary job is to attack Grym to maintain aggro and position him under the hammer.
- Ranged DPS: Position your ranged damage dealers (Wizards, Sorcerers, Rangers, or even a Thief Rogue) on the elevated platforms surrounding the forge. This provides them with a significant height advantage, increasing their hit chance and damage output. Keep them far away from Grym to minimize the risk of them being targeted.
- Melee Support (Optional): If you have a melee character who isn't your tank, keep them mobile and use them to deal supplemental damage or control the Lava Mephits.
Exploiting Grym's Predictable AI
As mentioned, Grym will relentlessly pursue the character who last attacked him. Use this to your advantage:
- Initial Setup: Position your tank near the center of the platform. Have them attack Grym to gain aggro.
- Lava Positioning: If Grym isn't already standing in lava, have your tank move slightly to position him correctly. Be careful not to move out of his melee range, or he might target someone else.
- Hammer Time: Once Grym is Superheated and positioned under the hammer, have someone else (preferably a character with high Strength) pull the lever to trigger the hammer. The character operating the lever should NOT be the tank, to avoid pulling aggro away from your tank.
- Repeat: Repeat the process, making sure your tank keeps Grym's attention and positioned for the hammer.
Adaptive Strategies: No Tank? No Problem!
Not every party has a dedicated tank. Here are some alternative strategies:
- Kiting with Ranged: If you lack a strong tank, use a character with high mobility (Rogue, Monk) and the Misty Step spell to kite Grym around the arena. Have them attack Grym, then immediately teleport or Dash away. This can be risky, but it's viable if you're careful.
- Magical Mayhem: Focus on using spells that inflict status effects, such as Hold Person or Web, to immobilize Grym. This will buy you time to position him in the lava and under the hammer.
- Lava Only (High Risk): You can theoretically kill Grym by luring him into the lava repeatedly, relying on the environmental damage. This is slow, dangerous, and not recommended unless you're severely underleveled or lacking the gear for the hammer strategy.
Tips and Tricks for a Smoother Fight
These tips and tricks will help you streamline the fight and avoid common pitfalls.
Resource Management: Potions, Scrolls, and Spells
- Haste: The Haste spell is invaluable for your tank, allowing them to attack more frequently and maintain aggro more easily. It also helps the lever operator to act faster.
- Bless: Bless improves your party's attack rolls and saving throws, increasing their overall effectiveness.
- Resistance Potions: Fire resistance potions can mitigate the damage from the lava and Lava Mephits.
- Healing Potions/Spells: Essential for keeping your tank alive.
- Scrolls of Invisibility/Misty Step: These can be used to reposition party members or escape from dangerous situations.
Party Composition Suggestions
Here are a few example party compositions that work well against Grym:
- The Classic: Fighter (Tank), Wizard (Ranged DPS), Cleric (Healer/Support), Rogue (Ranged DPS/Utility)
- The Magical Nuke: Paladin (Tank/Support), Sorcerer (Ranged DPS), Wizard (Ranged DPS/Control), Cleric (Healer/Support)
- The Melee Powerhouse: Barbarian (Tank/DPS), Fighter (DPS), Paladin (Support/DPS), Cleric (Healer)
As for the tank specifically, a Fighter with the Protection fighting style and high AC is ideal. A Paladin with heavy armor and healing spells is another great option. A Barbarian can work, but they will be much more reliant on healing.
Advanced Tactics: Pre-Buffing and More
- Pre-Buffing: Cast Bless, Haste, and any other beneficial spells before initiating the fight. This will give you a significant advantage right from the start.
- Environmental Awareness: Keep an eye on the Lava Mephits. They can be a major nuisance if left unchecked. Focus them down quickly with ranged attacks.
Common Mistakes to Avoid
- Standing in Lava: Obvious, but worth repeating. The lava deals significant damage. Stay out of it unless you're intentionally trying to lure Grym in.
- Ignoring Lava Mephits: These little pests can quickly overwhelm your party if you don't deal with them.
- Losing Aggro: If Grym switches targets, it can throw off your entire strategy. Make sure your tank is consistently attacking him.
- Failing to Position Grym: This is the most common mistake. If Grym isn't Superheated and under the hammer, you're wasting your time.
Min-Maxing: Optimized Builds, Gear, and Spells
For those who enjoy min-maxing, here are some suggestions:
- Tank Build: Focus on maximizing AC and Constitution. The Heavy Armor Master feat can further reduce incoming damage. Consider items that grant resistance to fire damage.
- DPS Build: Maximize your primary damage stat (Intelligence for Wizards, Charisma for Sorcerers, Dexterity for Rangers). Choose spells and abilities that deal high damage and have a good chance to hit.
- Key Spells: Haste, Bless, Fire Resistance, Hold Person, Web, Misty Step.
PC-Specific Notes: Optimize Your Experience
Playing on PC offers unique advantages in terms of control and customization. Here's how to optimize your Baldur's Gate 3 experience for the Grym fight:
Camera Control Customization
- Remap Q/E: By default, the Q and E keys rotate the camera. Consider remapping these to more comfortable keys for smoother tactical overview.
- Edge Panning: Enable edge panning in the game settings for more precise camera adjustments. This allows you to move the camera by simply moving your mouse to the edge of the screen.
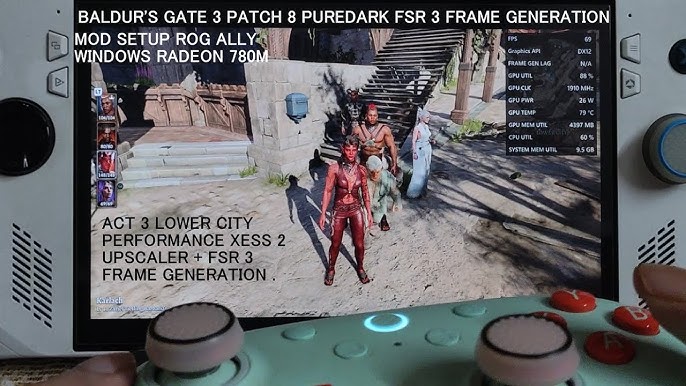
Graphical Settings Optimization
- Lower Particle Effects and Shadow Quality: The hammer strikes and lava flows can create a lot of particle effects, which can impact performance. Lowering these settings can significantly improve frame rates.
- Disable Dynamic Shadows: Dynamic shadows can also be performance-intensive. Disabling them can provide a noticeable boost, especially on lower-end systems.
- DLSS/FSR: If your graphics card supports it, enable DLSS (Nvidia) or FSR (AMD) for a performance boost with minimal visual impact. Experiment with different settings to find the best balance between performance and image quality.
Mod Recommendations
- Better Hotbar: This UI mod enhances party management and action queuing, making it easier to switch between characters and execute complex maneuvers.
- Status Effect Visibility Mods: Mods that improve the visibility of enemy status effects can help you track Grym's Superheated condition and other important debuffs.
- Performance Mods: Look for mods that offer texture compression or LOD (Level of Detail) adjustments to improve performance on lower-end PCs.
Hotkey Assignments
Set hotkeys for key spells and actions to enable faster decision-making during the turn-based combat. For example, assign hotkeys for Haste, Bless, healing spells, and your tank's primary attack.
Claim Your Rewards: Adamantine Gear and Beyond
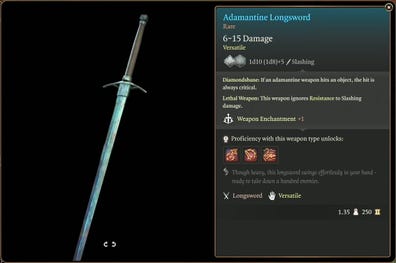
Defeating Grym is not just about bragging rights; it's about unlocking the potential of the Adamantine Forge. With Mithril Ore and molds acquired in the area, you can craft powerful Adamantine equipment, such as the Adamantine Scale Mail or the Adamantine Longsword. These items are incredibly valuable and will serve you well throughout Act 1 and beyond.
You'll also gain a significant amount of XP for defeating Grym and clearing the Adamantine Forge, which will help you level up and prepare for the challenges that lie ahead.


Conclusion: Forge Your Own Destiny
The Grym fight in the Adamantine Forge is a challenging but rewarding encounter in Baldur's Gate 3. By understanding the mechanics, exploiting Grym's AI, and optimizing your party composition and PC settings, you can emerge victorious and claim the Forge's valuable rewards. Remember, there's no single "right" way to beat Grym. Experiment with different strategies, adapt to your party's strengths, and don't be afraid to try new things. Now go forth, adventurer, and forge your own destiny!