Breathe New Life into the Commonwealth: A Fallout 4 Texture Overhaul Guide Fallout 4 is a fantastic game, no doubt.

Fallout 4 is a fantastic game, no doubt. But let's be honest, the vanilla textures can feel a little… dated. The good news? The PC version offers the incredible ability to drastically improve the visual experience through texture overhaul mods. We're not talking about character model tweaks or UI changes here; we're diving deep into the world of high-resolution landscapes, buildings, and objects that will make the Commonwealth feel truly next-gen. Get ready to transform the muddy browns and pixelated surfaces into something breathtaking.
This guide is your one-stop resource for navigating the world of Fallout 4 texture mods. We'll cover everything from essential tools to installing mods, understanding load order, troubleshooting common issues, and even some advanced tips for those who want to push their game's visuals to the limit. We'll be focusing on replacing existing, lower-resolution textures with stunning, higher-quality alternatives, breathing new life into the world Bethesda created.
Gearing Up: The Tools You'll Need
Before we jump in, let's make sure you have the right tools for the job. These are essential for a smooth and enjoyable modding experience.
- Nexus Mods Account: This is your gateway to a vast library of mods. Head over to NexusMods.com and create a free account. You'll need it to download mods.
- Mod Organizer 2 (MO2) or Vortex: I highly recommend Mod Organizer 2. It's a more advanced mod manager that keeps your Fallout 4 installation clean by creating a virtual file system for mods. This means mods don't directly alter your game files, making it easier to troubleshoot and uninstall them. Vortex, the other popular option from Nexus Mods, works too, but MO2 offers more control.
- Fallout 4 Script Extender (F4SE): While not always required for texture mods, F4SE unlocks advanced scripting capabilities for Fallout 4. Some texture mods might have dependencies that rely on F4SE, so it's best to have it installed. You can find it at f4se.silverlock.org.
- A Legitimate Copy of Fallout 4: This should be obvious, but you need a legally obtained copy of Fallout 4 installed on your PC. Certain texture packs might also require specific DLCs (like Far Harbor or Nuka-World), so check the mod description before downloading.
PC Requirements: Can Your Rig Handle the Upgrade?
High-resolution textures demand more from your system. Before you go overboard, consider your PC's specs. Here's a general guideline:
- Minimum: Intel Core i5-2300 or AMD Phenom II X4 945, 8GB RAM, NVIDIA GTX 550 Ti 2GB or AMD Radeon HD 7870 2GB. You'll likely be able to run some texture mods, but don't expect ultra-high resolutions.
- Recommended: Intel Core i7-4790 or AMD FX-9590, 8GB RAM, NVIDIA GTX 780 3GB or AMD Radeon R9 290X 4GB. This setup can handle most texture mods at reasonable settings.
- Ideal: Intel Core i7-6700K or AMD Ryzen 5 1600X, 16GB RAM, NVIDIA GTX 1070 8GB or AMD Radeon RX Vega 56 8GB. With this, you should be able to crank up the texture resolution without significant performance drops.
If you're unsure, start with smaller texture packs and monitor your FPS.
Getting Started: Setting Up Mod Organizer 2
Let's get Mod Organizer 2 ready to roll.
- Download and Install: Download Mod Organizer 2 from the Nexus Mods website. Install it outside of your Fallout 4 installation directory (e.g.,
C:\Modding\ModOrganizer2). - Run Mod Organizer 2: The first time you run MO2, it will ask you to manage a game. Select Fallout 4.
- Nexus Mods Integration: MO2 will prompt you to connect to your Nexus Mods account. This allows you to directly download mods from the Nexus within MO2.
Installation Walkthrough: FlaconOil's Complete Retexture Project
Let's walk through installing a fantastic texture overhaul: FlaconOil's Complete Retexture Project. This mod overhauls a wide range of environmental textures, making it a great starting point.
- Download the Mod: Go to the FlaconOil's Complete Retexture Project page on Nexus Mods. Click the "Files" tab and download the main file using the "Mod Manager Download" button. This will automatically send the download to Mod Organizer 2.
- Install in Mod Organizer 2: In MO2, you'll see the mod in the "Downloads" tab (usually at the bottom). Double-click it to install.
- Activate the Mod: The mod will now appear in the left panel of MO2. Make sure the checkbox next to it is ticked to activate it.
Load Order and Conflict Resolution
Load order matters! Texture mods generally need to load after any mods that alter the same assets. A tool like LOOT (Load Order Optimization Tool) can help you automatically sort your load order. You can download LOOT from loot.github.io.
However, sometimes LOOT isn't perfect, and conflicts can still arise. This is where Mod Organizer 2's conflict resolution tools come in handy. MO2 visually indicates conflicts by displaying colored icons next to mods.
To resolve conflicts:
- Right-click on a mod with a conflict.
- Select "Information."
- Go to the "Conflicts" tab. This will show you which files are being overwritten by other mods.
- Drag the mod higher or lower in the left panel to change its priority. The mod lower in the list will overwrite the files of mods higher in the list.
Verifying Your Installation
Time to see the fruits of your labor! Launch Fallout 4 through Mod Organizer 2 (always launch the game through MO2 to ensure your mods are loaded). Head to a location with noticeable textures, such as:
- Concord: The buildings and streets are a great place to see texture improvements.
- Sanctuary Hills: Check out the houses, trees, and ground textures.
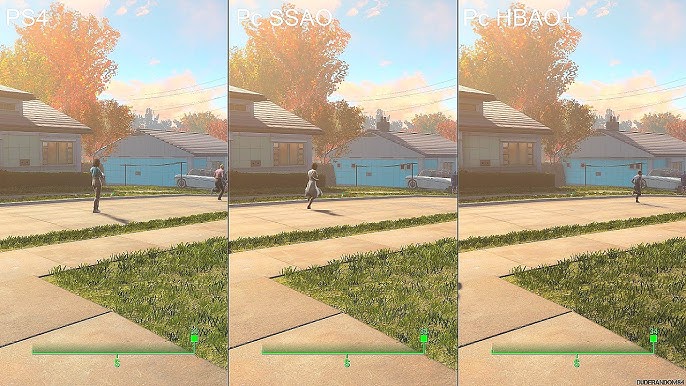
Compare the textures to screenshots of the vanilla game. You should see a significant increase in detail and sharpness.

Troubleshooting Common Texture Issues
Even with the best planning, things can sometimes go wrong. Here are some common issues and how to fix them:
- Missing Textures (Purple Textures): This usually indicates that a texture file is missing or not loading correctly.
- Cause: Incorrect installation, load order conflicts, or corrupted files.
- Solution: Double-check that the mod is installed correctly and activated in Mod Organizer 2. Verify the game files through Steam. Ensure there are no conflicting mods overwriting the textures. Insufficient VRAM can also cause this - try lowering texture settings.
- Performance Issues (Stuttering, Low FPS): High-resolution textures can strain your system.
- Cause: Your PC doesn't meet the requirements for the texture resolution.
- Solution: Reduce the texture resolution in the Fallout 4 launcher settings. Try using a texture optimization tool like Texture Optimization Project (TOP) to compress textures without significant visual loss.
- Incompatible Texture Mods: Two texture mods might try to replace the same texture files.
- Cause: Overlapping files.
- Solution: Use Mod Organizer 2's conflict resolution tools to determine which mod should take priority. Alternatively, try using a "merge" tool to combine the mods (advanced).
Pro Tips for the Discerning Modder
- Mod Combinations: Experiment with different texture mods to find a combination that suits your taste. Consider pairing landscape retextures with building and object retextures for a complete overhaul.
- Texture Optimization Project (TOP): TOP is your friend if you're struggling with performance. It optimizes textures, reducing their file size without drastically impacting visual quality. You can find it on Nexus Mods.
- Creating Custom Texture Packs: For the truly adventurous, you can create your own texture packs using image editing software like Photoshop or GIMP. This involves extracting the original textures, editing them, and then packaging them into a new mod. This is an advanced topic, so start with online tutorials!
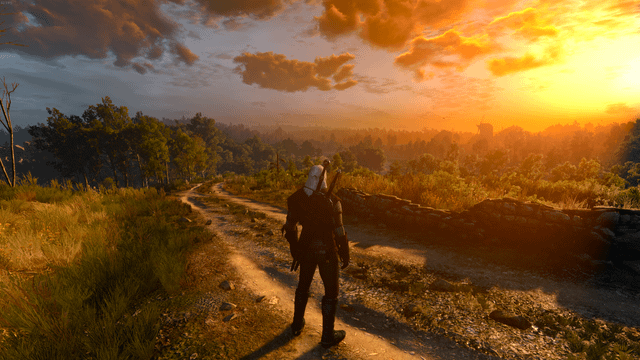
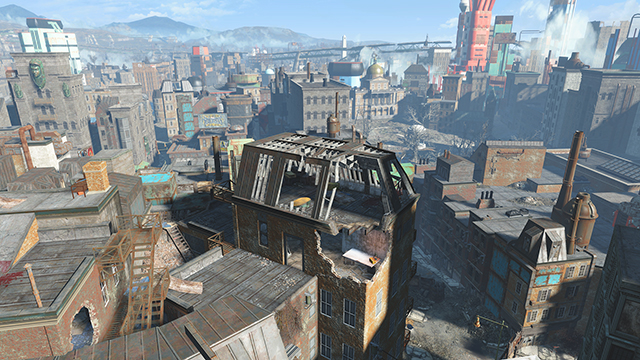
Before and After: The Visual Impact
Let's take a look at the difference texture mods can make.
Conclusion: Your Commonwealth, Reimagined
Texture overhaul mods are a game-changer for Fallout 4. They breathe new life into the Commonwealth, making it more immersive and visually stunning. By following this guide, you'll be well-equipped to navigate the world of texture modding, troubleshoot common issues, and create a personalized visual experience that will keep you exploring the Wasteland for hours on end. Remember to start small, experiment, and most importantly, have fun! The modding community is vast and helpful, so don't be afraid to ask questions and explore. Happy modding!