Blackpits Breakdown: A XenGamer's Guide to Crushing the Sallow Man in Divinity: Original Sin 2 Welcome, fellow strategists, to a deep dive into one of Divinity: Original Sin 2's most frustrating encounters: the Sallow Man ambush in the Blackpits.

Welcome, fellow strategists, to a deep dive into one of Divinity: Original Sin 2's most frustrating encounters: the Sallow Man ambush in the Blackpits. This isn't your average fight; it's a volatile cocktail of high-level enemies (all clocking in at Level 12), treacherous environmental hazards, and a dialogue tree that can easily send your meticulously crafted plans spiraling into the abyss. Fear not, for this guide, forged in the fires of countless reloads and informed by obsessive data analysis, guarantees victory. We'll dissect every phase of this encounter, leaving no stone unturned and no opportunity for exploitation missed. Prepare to embrace your inner min-maxer; we're going to war.
I. Context: The Sallow Man Ambush (Level 12)
The Blackpits. A festering wound on Rivellon, choked with smoke and shimmering with the sickly green glow of tainted oil. Here, amidst the decaying derricks and pools of volatile fuel, the Sallow Man and his Voidwoken cronies lie in wait. This ambush is a brutal test of your tactical acumen, demanding meticulous planning and flawless execution. One wrong move, one overlooked vulnerability, and you'll be staring at the game over screen faster than you can say "Source Hound." We're dealing with level 12 enemies, so expect high armor values, potent magic, and devastating physical attacks. The oil-soaked ground only amplifies the danger, turning every spark into a potential inferno. This isn't just a fight; it's a meticulously designed death trap. But we, the paragons of XenGamer, will turn it against them.
II. Step-by-Step Strategy: Guaranteed Victory (Through Scrupulous Planning)
Our approach is simple: dominate the battlefield, control the enemy, and exploit every weakness with ruthless efficiency. This requires a multi-stage plan, beginning long before the first arrow is loosed.
Pre-Combat Setup (God Mode Prep):
Positioning is paramount. Before initiating dialogue, scout the area with your highest Wits character. Identify high ground, potential bottlenecks, and oil barrel locations. This character is expendable during scouting; if they trigger combat prematurely, reload. We need perfect information.
Ideal Party Composition:
- Tank: Warfare-heavy. Focus: Constitution, Perseverance. Skills: Fortify, Bone Cage, Provoke. Gear: High physical armor, shield. Role: Absorb damage, draw aggro, control enemy positioning. Taunt the Sallow Man at the start of the battle to keep him in a tight location.
- Damage Dealer 1 (Pyro/Geo Mage): Intelligence, Memory. Skills: Ignition, Impalement, Earthquake, Fossil Strike. Gear: Intelligence-boosting items, fire resistance. Role: Area-of-effect damage, immobilization, environmental control.
- Damage Dealer 2 (Huntsman Archer): Finesse, Critical Chance. Skills: Tactical Retreat, Arrow Spray, Ballistic Shot, First Aid. Gear: High damage bow, critical chance modifiers. Role: Ranged damage, target prioritization, repositioning.
- Support/Healer (Hydro/Aero Mage): Intelligence, Memory. Skills: Healing Rain, Armor of Frost, Teleportation, Rain. Gear: Magic armor, cooldown reduction. Role: Healing, status effect removal, mobility, crowd control.
Initiate Dialogue (Save-Scumming Required):
This is where the real fun begins. Approach the Sallow Man and trigger the dialogue. SAVE IMMEDIATELY BEFORE EACH DIALOGUE CHOICE. This is non-negotiable.

Optimal Dialogue Path (subject to slight variations based on persuasion skills):
- (Initial Greeting) "What are you doing here?"
- "We're just passing through." (Avoids immediate hostility.)
- "We've heard rumours of a powerful artifact." (Baits him into revealing information.)
- [PERSUASION CHECK] (Attempt to persuade him you are interested in joining him). If successful, you avoid the fight entirely, though you must still complete the quest. Even if you plan to fight, attempt the persuasion check, as failing it won't necessarily trigger combat. Save, reload, save, reload until successful. If unsuccessful, choose another dialogue option, and begin combat on your terms.
- If Persuasion fails (or if you want the XP): "I think we'll take our chances." (Triggers combat initiation.)
The goal is to control when and how the fight starts. Never let the AI dictate the terms of engagement.
Round 1 (The Debuff Blitz):
Pre-buff before the dialogue ends! Fortify and Armor of Frost are mandatory.
- Tank: Provoke the Sallow Man. This forces him to focus on your tank, keeping him away from your squishier damage dealers. Use Fortify and Bone Cage as needed.
- Pyro/Geo Mage: Cast Fossil Strike to create an oil slick under the Sallow Man and any clustered Voidwoken. Follow up with Ignition to set it ablaze.
- Huntsman Archer: Use Tactical Retreat to gain high ground advantage. Apply Crippling Blow to the Sallow Man to reduce his movement.
- Hydro/Aero Mage: Cast Rain if necessary to extinguish flames on your party. Use Armor of Frost on any party member suffering from burning or poison.
Oil & Fire Exploitation (The Scorched Earth Tactic):
The Blackpits are a tinderbox. We'll use that to our advantage.
- Utilize oil barrels (if any are nearby) to create large pools of oil. Ignite them strategically to damage and control enemy movement.
- The Pyro/Geo mage is key here. Focus on creating and maintaining burning surfaces.
- Be extremely careful with your own positioning. Fire resistance is your friend. The Apotheosis skill (Source skill) is also very useful.
Target Prioritization (The Ruthless Efficiency Method):
- Eliminate the weaker Voidwoken adds first. They may seem insignificant, but their combined damage output can quickly overwhelm your party.
- Once the adds are down, focus all fire on the Sallow Man. He's the biggest threat, and taking him down quickly will significantly reduce the difficulty of the encounter.
- Pay attention to enemy armor types. Switch damage types as needed to maximize effectiveness.
Continuous Control (The Stunlock Symphony):
Crowd control is crucial. Keep enemies disabled as much as possible.
- Knockdown: Warfare skills like Battering Ram and Battle Stomp.
- Stunned: Shocking spells from Aerotheurge.
- Frozen: Water spells from Hydrosophist.
- Petrified: Earth spells from Geomancer.
A stunned or petrified enemy deals zero damage. This is elementary, but often overlooked.
Victory & Loot (The Spoils of War):
Once the Sallow Man is vanquished, loot his corpse. Key items include unique weapons and armor, as well as crafting materials. The experience gained is also substantial. Victory is sweet, but efficient looting is sweeter.
III. Tips and Tricks: The Devil is in the Data
- Pre-buffing: I cannot stress this enough. Fortify, Armor of Frost, Haste - use everything at your disposal before initiating combat.
- High Ground Advantage: Archers and mages on high ground deal increased damage and have greater range. Exploit this.
- Teleportation: Teleportation is your friend. Reposition enemies into oil slicks, away from your party, or into chokepoints.
- Resistances: Maximize your fire resistance. The oil and fire will be constant threats. Consider using the Torturer talent on your mage to apply burning and poison effects that pierce armor.
- Lone Wolf vs. Four-Man Party: Lone Wolf offers increased stats and action points, but it requires a different tactical approach. This guide is optimized for a four-man party. Lone Wolf strategies are an advanced consideration.
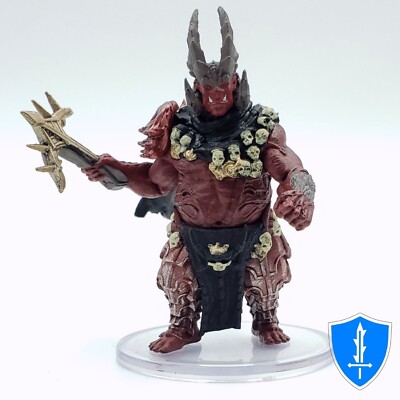
- Enemy Weaknesses: Scrutinize the Sallow Man's stats. Identify any elemental weaknesses and exploit them relentlessly. See image below.
IV. PC-Specific Notes: Save-Scumming and Dialogue Optimization
- Save Management: Develop a robust save system. Save before every dialogue choice, after every successful round, and before attempting any risky maneuver. Name your saves descriptively (e.g., "SallowMan_Dialogue_PersuasionAttempt," "SallowMan_Round1_Success"). Store saves in separate folders. Overwriting is the enemy.
- Dialogue Consequences: The flowchart above provides a visual representation of the dialogue tree. Memorize it. Internalize it. Become one with it.
- Character Build Optimizer: Consider using external character build optimizers for Divinity: Original Sin 2. Every point matters.
- Mod Recommendations: Quality of Life (QOL) mods can significantly improve your experience. I recommend mods that improve inventory management. A cluttered inventory is a tactical liability.
V. Conclusion: A Lesson in Exploitation
The Sallow Man encounter is a crucible. It tests your knowledge of Divinity: Original Sin 2's mechanics, your tactical prowess, and your willingness to exploit every available advantage. The key to victory is meticulous planning, ruthless execution, and an unwavering commitment to data-driven decision-making. By understanding enemy weaknesses, manipulating the environment, and controlling the flow of combat, you can overcome this challenging encounter and emerge victorious. Plus, the loot is pretty good. This will allow you to complete the quest "A Taste of Death", and to claim the associated rewards. Now, go forth and conquer! The Blackpits await.
[Example Link](https://www.example.com)