Baldur's Gate 3: Dominate Grym in the Adamantine Forge - A Veteran's Guide Grym, the hulking construct guarding the Adamantine Forge in Baldur's Gate 3, presents a significant challenge for even seasoned adventurers.
Grym, the hulking construct guarding the Adamantine Forge in Baldur's Gate 3, presents a significant challenge for even seasoned adventurers. This Act 1 boss in the Grymforge area boasts near-immunity to almost all damage types. However, Grym has one major weakness: bludgeoning damage while standing in lava. This guide, penned by a veteran player, will walk you through a surefire strategy to exploit that vulnerability and claim victory, focusing on environmental manipulation rather than specific character builds. Get ready to use the forge itself against its master.
The Adamantine Forge: A Crucible of Combat
The Adamantine Forge is more than just a crafting station; it's the arena where you'll face Grym. Understanding its components is key to victory. The forge consists of a central platform, a lava valve to flood the arena, and a control mechanism to trigger the forge hammer. Manipulating these elements is crucial, as Grym only becomes vulnerable while submerged in lava. Let's dive into how to turn this forge against its fiery inhabitant.
Step-by-Step Strategy: Forging Your Victory
Here's a detailed breakdown of how to systematically defeat Grym:
1. Activating the Forge: Preparing for Battle
First, you need to bring the forge to life. Interact with the lava valve to channel molten rock into the arena. Then, approach the central platform control and activate it. This will trigger Grym's dramatic entrance, so be prepared!
2. Positioning: Setting the Stage
Proper positioning is paramount. Your party should spread out around the central platform. Designate two characters (ideally those with high dexterity or advantage on saving throws) to operate the central platform controls. Have another character focused on the lava valve, ready to activate it on cue. Your remaining party members will be your damage dealers.
- Melee Characters: Position these closer to the edge of the platform, ready to strike when Grym is vulnerable.
- Ranged Characters: Elevate them on the surrounding ledges for a height advantage.
- Support characters Make sure you keep your support/healer away from Grym at all times, you dont want them downed before they get to use their spells or potions
Remember to space out your party members to minimize the impact of Grym's area-of-effect attacks. Optimal party placement around the Adamantine Forge. Note the character on the upper ledge, while another stands ready at the Lava Valve.
3. Lava Control: Turning Up the Heat
Grym's vulnerability hinges on lava. He only takes significant damage while standing in lava. Your designated character must activate the lava valve before your damage dealers attack each round. This ensures Grym is standing in the molten rock when your bludgeoning attacks land.
4. Weak Points: Exploiting Vulnerability
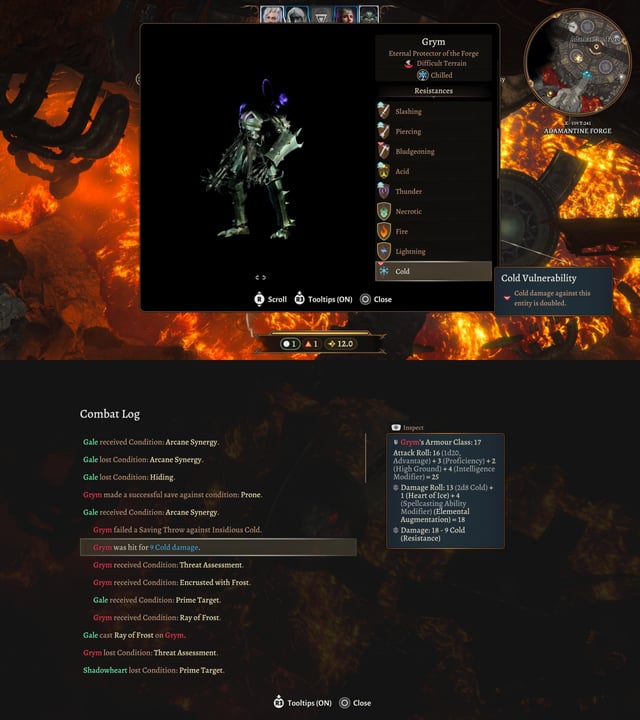
Grym's character sheet reveals the key: resistance to almost all damage types, but vulnerability to bludgeoning damage when standing in lava. Equip your characters with warhammers, mauls, or spells like Shatter that deal bludgeoning damage. Prioritize characters with high strength or abilities that enhance bludgeoning attacks.
 Grym's resistances and vulnerabilities clearly displayed.
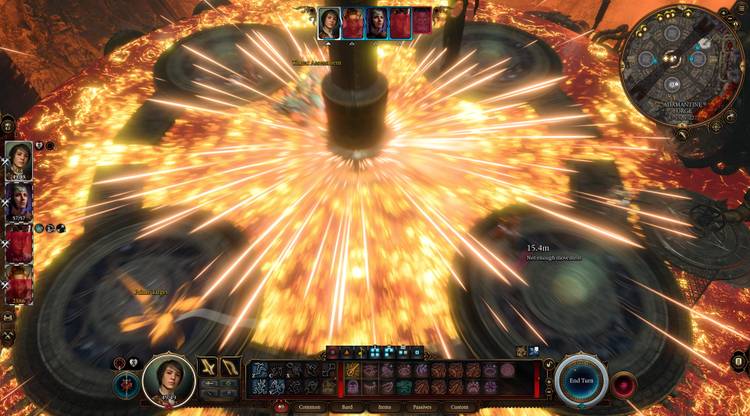
5. Forge Hammer: Delivering the Crushing Blow
The Forge Hammer is your secret weapon. By interacting with the central platform control, you can command the hammer to strike. The trick is positioning Grym directly beneath the hammer while he's standing in lava. This combination delivers massive damage and often inflicts the prone condition, granting advantage on subsequent attack rolls. Only use the Forge Hammer every other turn, alternating between hammer strikes and direct attacks to maximize damage output. Position is critical here. Make sure Grym is directly in the crosshairs, shown on the UI from the central platform console, to ensure that the hammer strikes and deals damage.
 Central platform controls showing how to utilize the forge hammer.
6. Avoiding Attacks: Staying Alive
Grym has two main attacks to watch out for:
- Lava Bomb: A ranged attack that deals fire damage in an area. Spread out your party to minimize its impact.
- Melee Strikes: Powerful close-range attacks. Use the Dodge action or equip high AC armor to mitigate damage. Remember, Grym cannot climb, so using the elevated platforms can provide a safe haven for ranged characters.
 Grym vulnerable to bludgeoning damage as he stands in the lava.
7. Repeat: Rinse and Repeat
The key to this strategy is consistency. Each turn, follow these steps:
- Activate the lava valve.
- Position Grym under the Forge Hammer (if it's ready).
- Unleash bludgeoning attacks while he's standing in the lava.
- Dodge or mitigate Grym's attacks.
- Repeat until victory!
Tips and Tricks: Gaining an Edge
Here are some extra tips to further optimize your fight against Grym:
- Terrain Advantage: Utilize the elevated platforms for ranged characters to gain advantage on attack rolls, increasing their accuracy.
- Potion of Speed: A Potion of Speed on your primary bludgeoning damage dealer allows them to attack twice per round, significantly boosting damage output when Grym is vulnerable.
- Breaking Stalactites: Keep an eye on the ceiling! The destructible stalactites can be shot down, dealing additional damage to Grym and potentially knocking him prone.
- Shatter Spell: The Shatter spell, when cast by a character with high spell save DC, is a devastating way to apply bludgeoning damage to Grym while he is standing in lava.
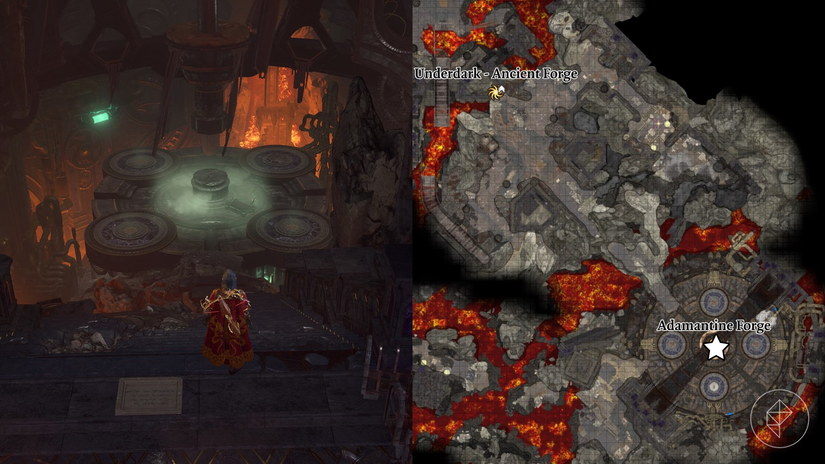
 Map showing the location of the mithril veins to craft Adamantine equipment.
PC-Specific Notes: Optimizing Performance
The Adamantine Forge's visual effects can strain your PC. If you experience performance issues, try these adjustments:
- Shadow Quality: Lowering this to "Low" or "Medium" significantly reduces the load on your GPU.
- Cloud Quality: Set this to "Low" to minimize performance-intensive volumetric effects.
- Ambient Occlusion: Disable or set to "Low," as this setting can heavily impact performance.
- Model Quality: Experiment with lowering this setting to find a balance between visual fidelity and performance.
You can find these settings in the graphics options menu.
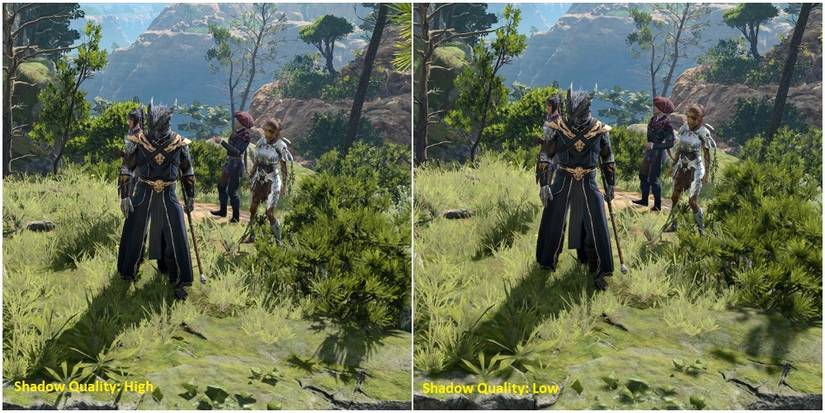 In-game graphics settings highlighting the recommended adjustments.
If available, enable DLSS or FSR to boost performance without drastically reducing visual quality. Also, ensure you have the latest graphics drivers installed.
Alternative Strategies
While the environmental strategy is highly reliable, some players have found success with alternative tactics:
- Using Sussur Bloom: While less reliable, the Sussur Bloom plant can be used to temporarily negate Grym's resistances.
- Knockback and Prone: Utilizing spells and abilities that knock Grym prone can grant advantage and extra damage opportunities.
- Soloing Grym: This can be challenging but is possible with specific character builds and a deep understanding of the game's mechanics.
Mastering the Forge: Rewards and Crafting
Defeating Grym is not just about bragging rights; it unlocks the potential to craft powerful Adamantine equipment at the forge. To do so, you'll need to locate the moulds scattered throughout the Grymforge area and mine Mithril Ore. Explore thoroughly to gather these essential materials.
 Adamantine Forge crafting interface and available materials.
Molds and Locations
You can find 6 molds to forge different Adamantine equipment:
- Longsword Mold: Located near the Ancient Forge.
- Mace Mold: Located on a table near the Lava Elemental.
- Scimitar Mold: Located on a corpse near the Lava Elemental.
- Shield Mold: Located on the lower level of the forge, near some skeletons.
- Scale Mail Mold: Located in a chest near the Lava Elemental.
- Splint Mold: Located on the ground, near a skeleton and some broken machinery.
With these molds in hand and mithril ore, you will be able to craft high powered equipment early in your playthrough.
Mithril Veins
You will need to find mithril ore for the different molds you have, here are the two locations of Mithril Veins in the area to get Mithril Ore:
- The first Mithril vein is west of the boss arena (X: -644, Y: 260)
- The second Mithril Vein is south from the first one (X: -598, Y: 218).
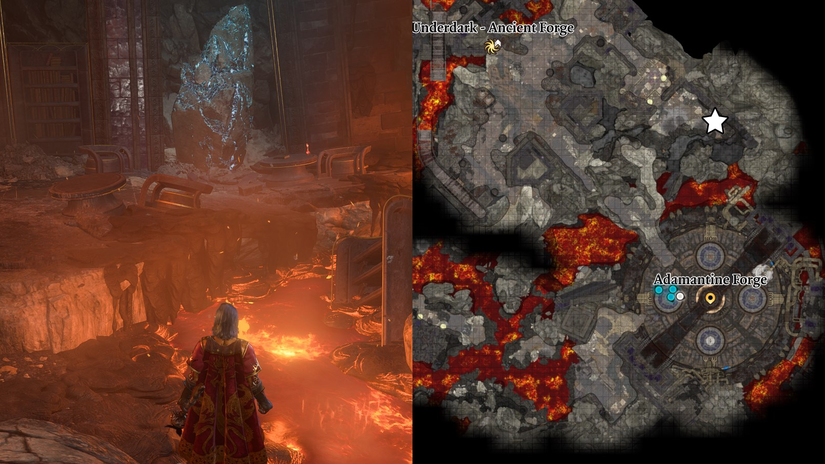 Visual representation of Mithril veins on the map.
Conclusion: Triumph Over the Forge Guardian
Defeating Grym in Baldur's Gate 3 is a rewarding experience. Not only do you gain access to powerful crafting capabilities, but you also overcome a challenging encounter that tests your strategic thinking and resourcefulness. By mastering the Adamantine Forge's mechanics and exploiting Grym's vulnerabilities, you'll emerge victorious. Now go forth and forge your legend!
Ready to test your mettle? Head into the Grymforge, and use this guide to crush Grym! Share your victories and strategies in the comments below! Also, check out our other Baldur's Gate 3 guides for more tips and tricks!